Build a dialogue
Description: Create a branching conversation between two characters.
A dialogue graph connects spoken lines, player choices, and endings. This tutorial creates a conversation between Mira Thorne, an innkeeper, and Charlie, the player character. Charlie selects one of three replies, and Mira responds to each one.
Tutorial project. Download the project to follow these
steps. Open create_dialogue to begin. The create_dialogue_final project contains the
completed result.
Open the graph view
Select Quests & Dialogues in the left sidebar or press ⌥2.
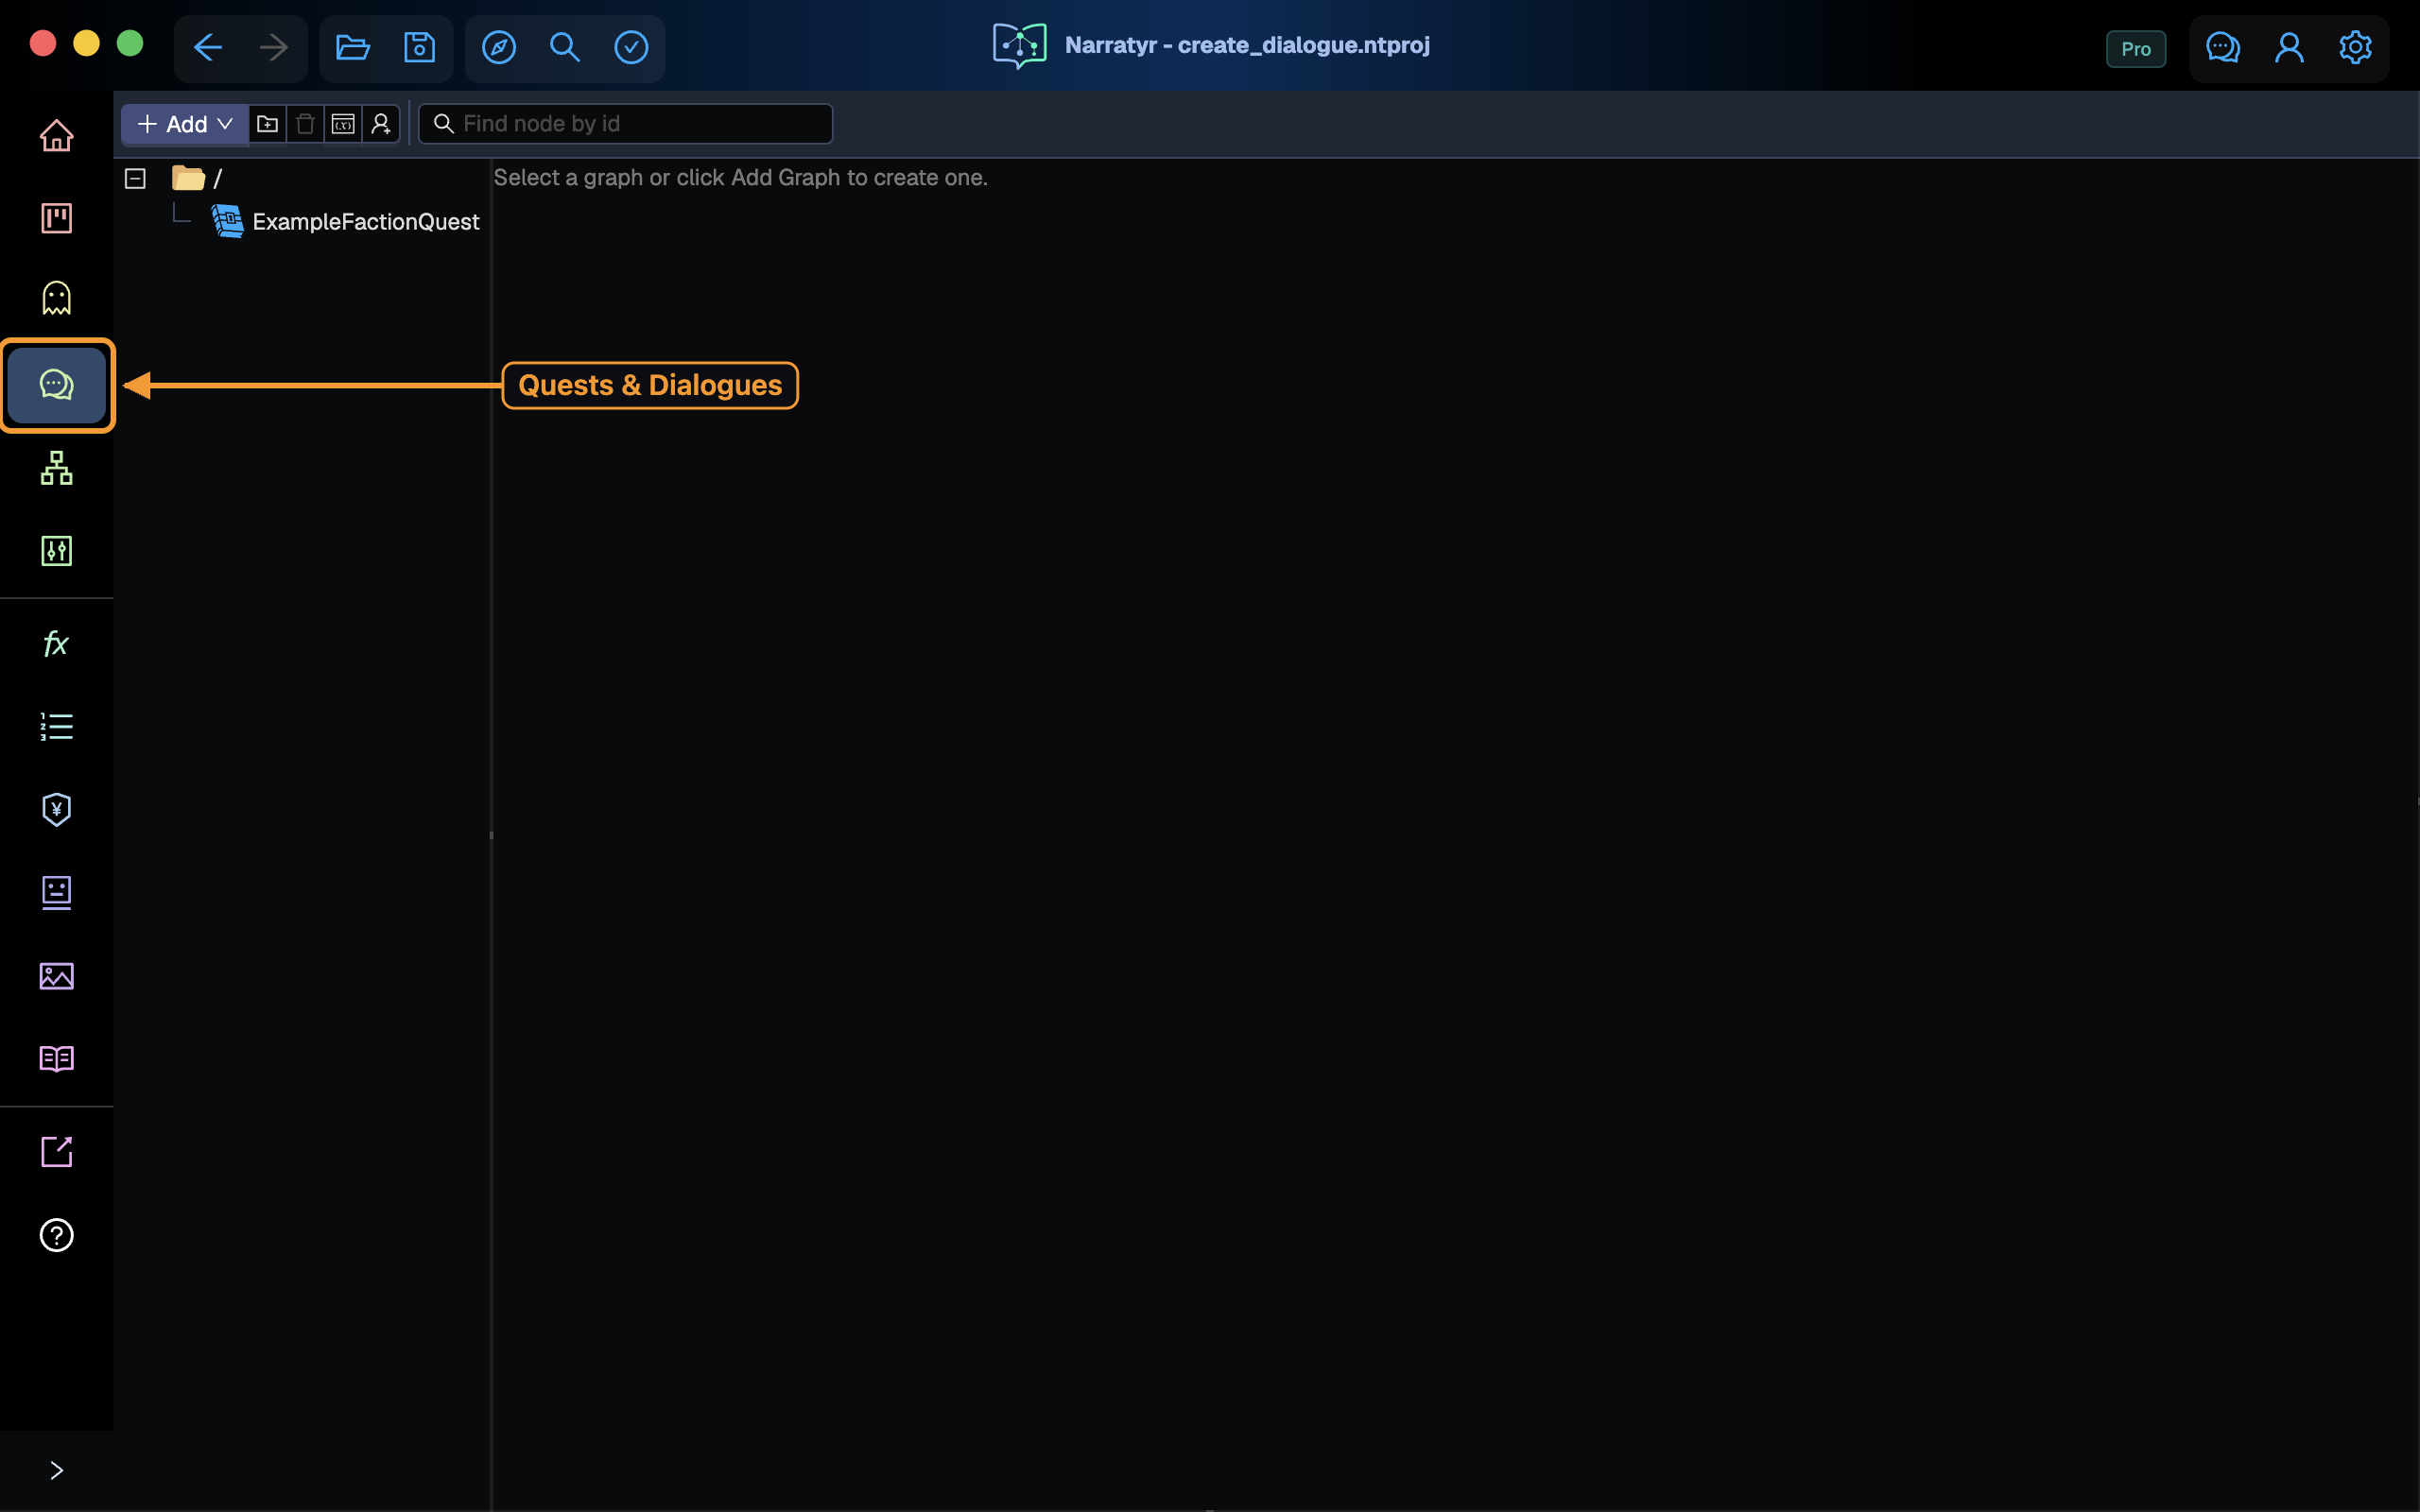
The left panel lists project graphs, the middle panel contains the canvas, and the right panel shows properties for the current selection.
Create and name a dialogue
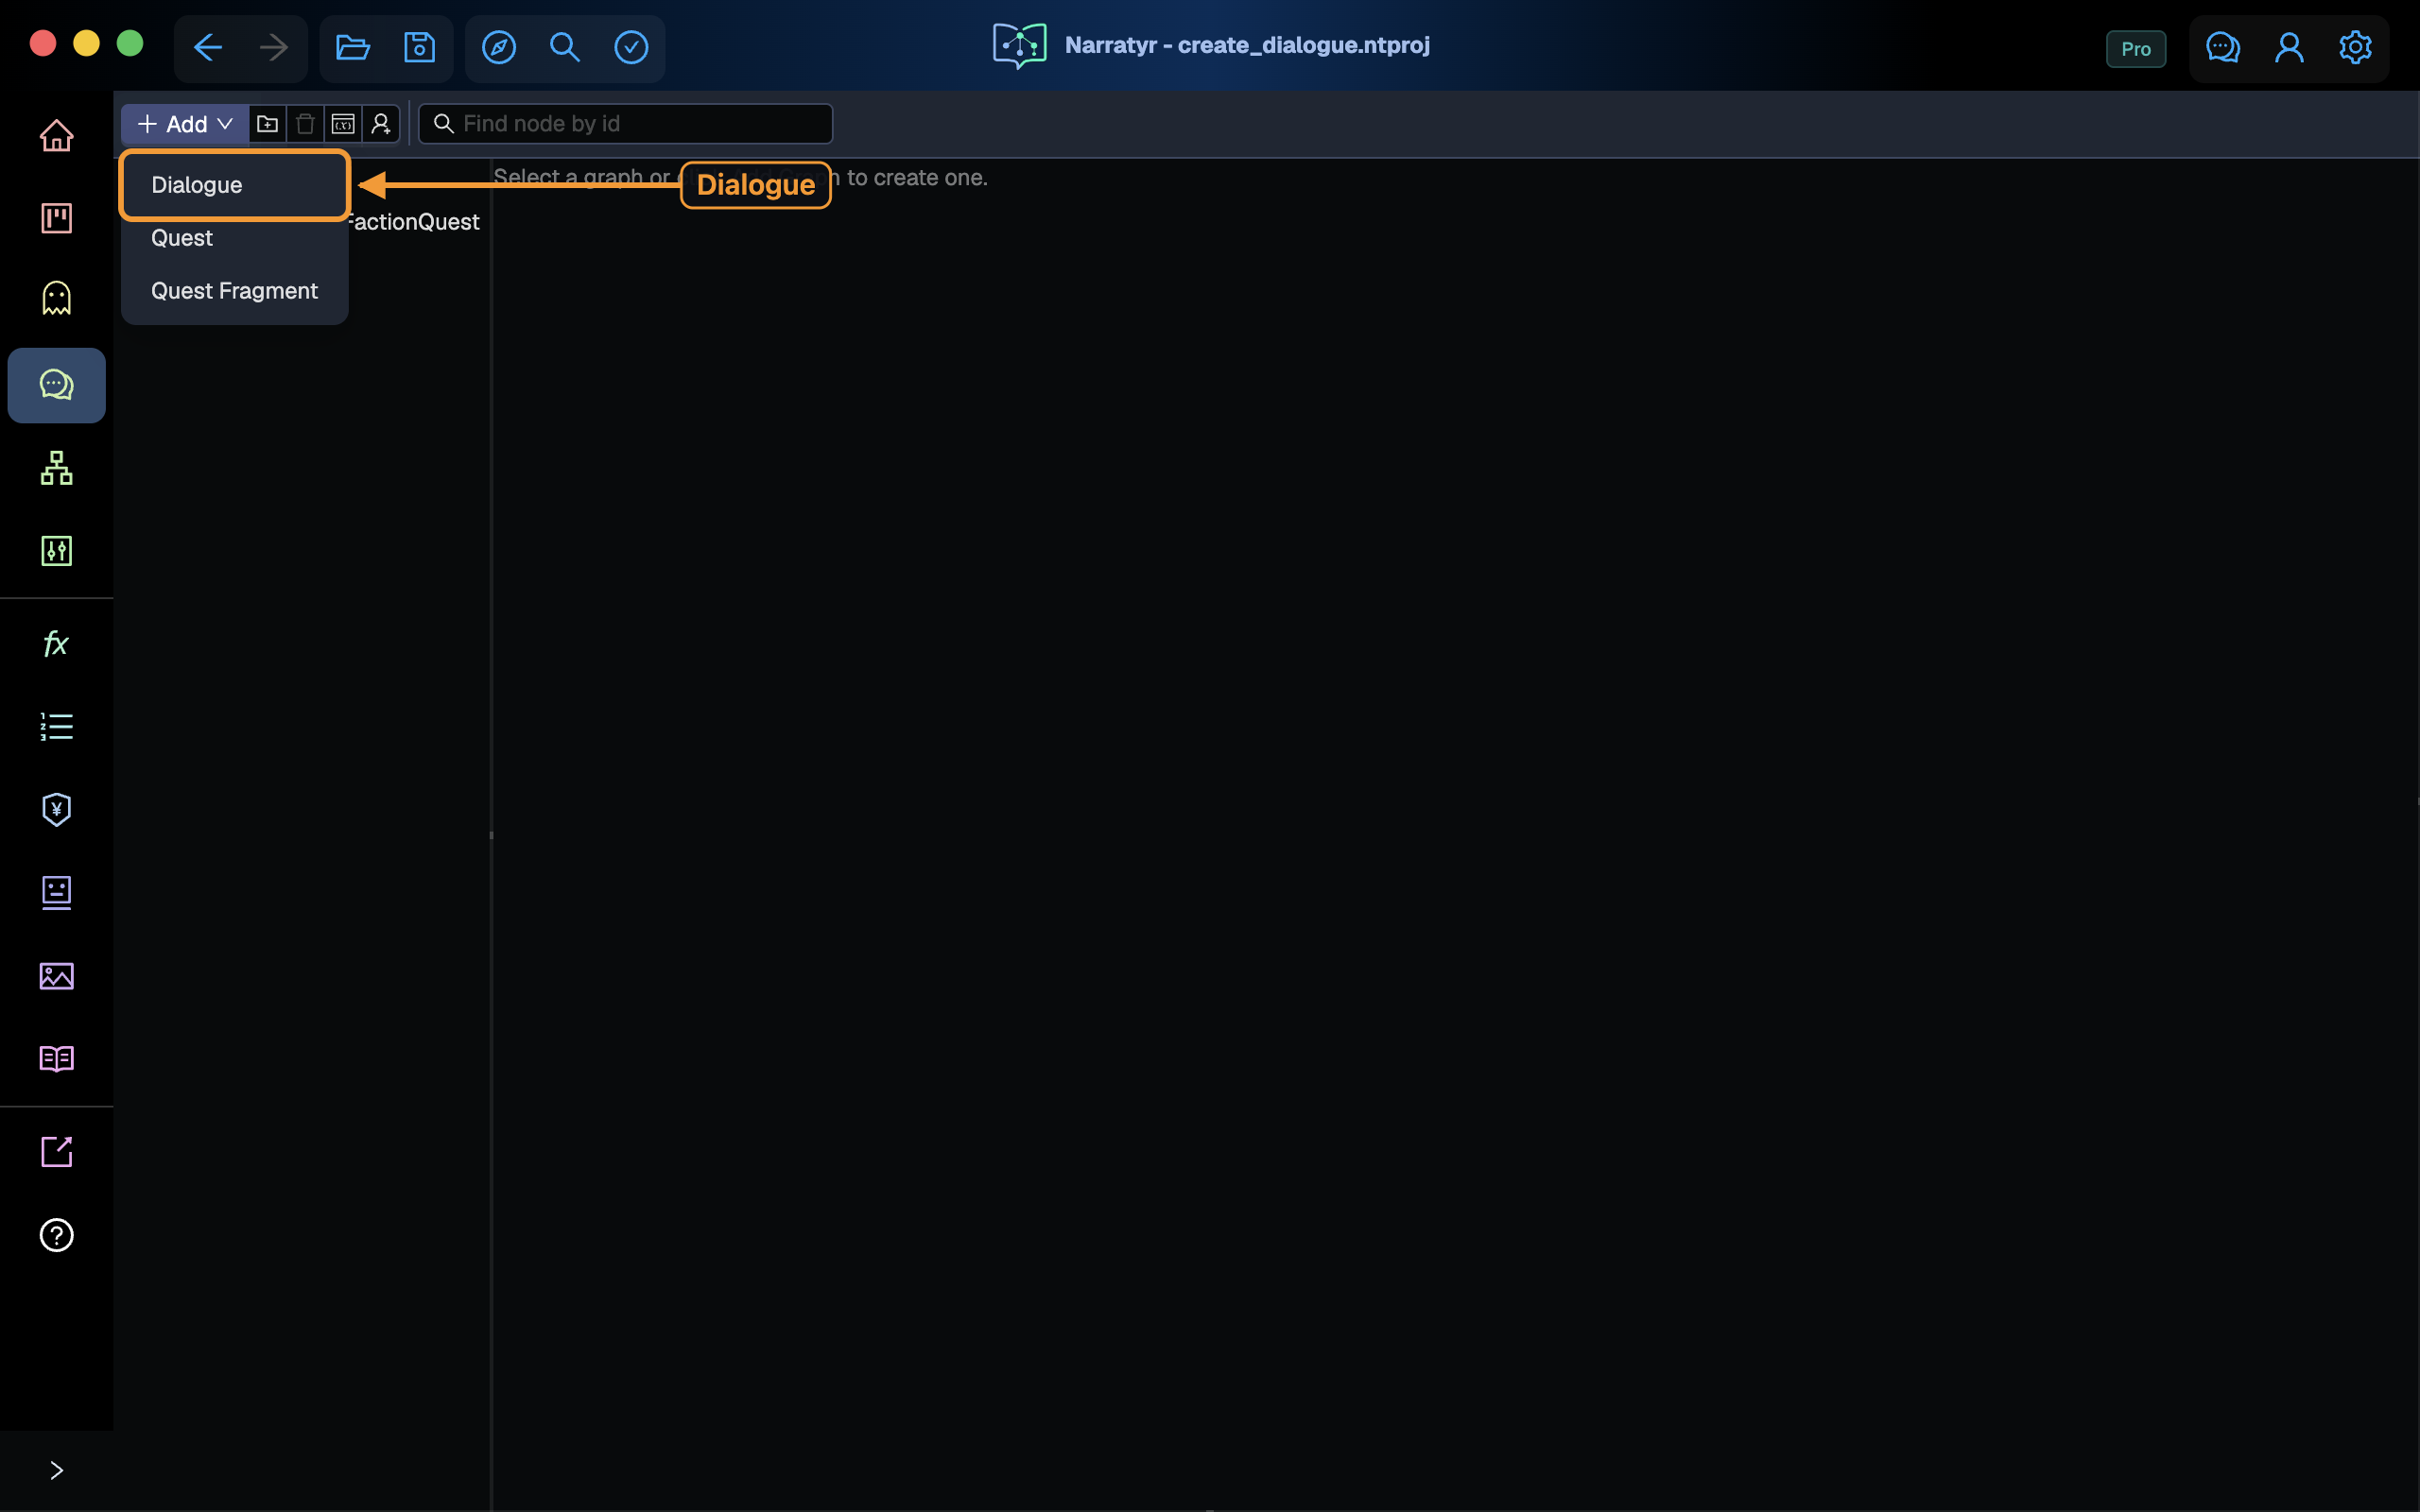
Select Add in the toolbar, then choose Dialogue.
Narratyr adds the graph to the tree and selects its name. Enter MiraGreeting and press
Enter.
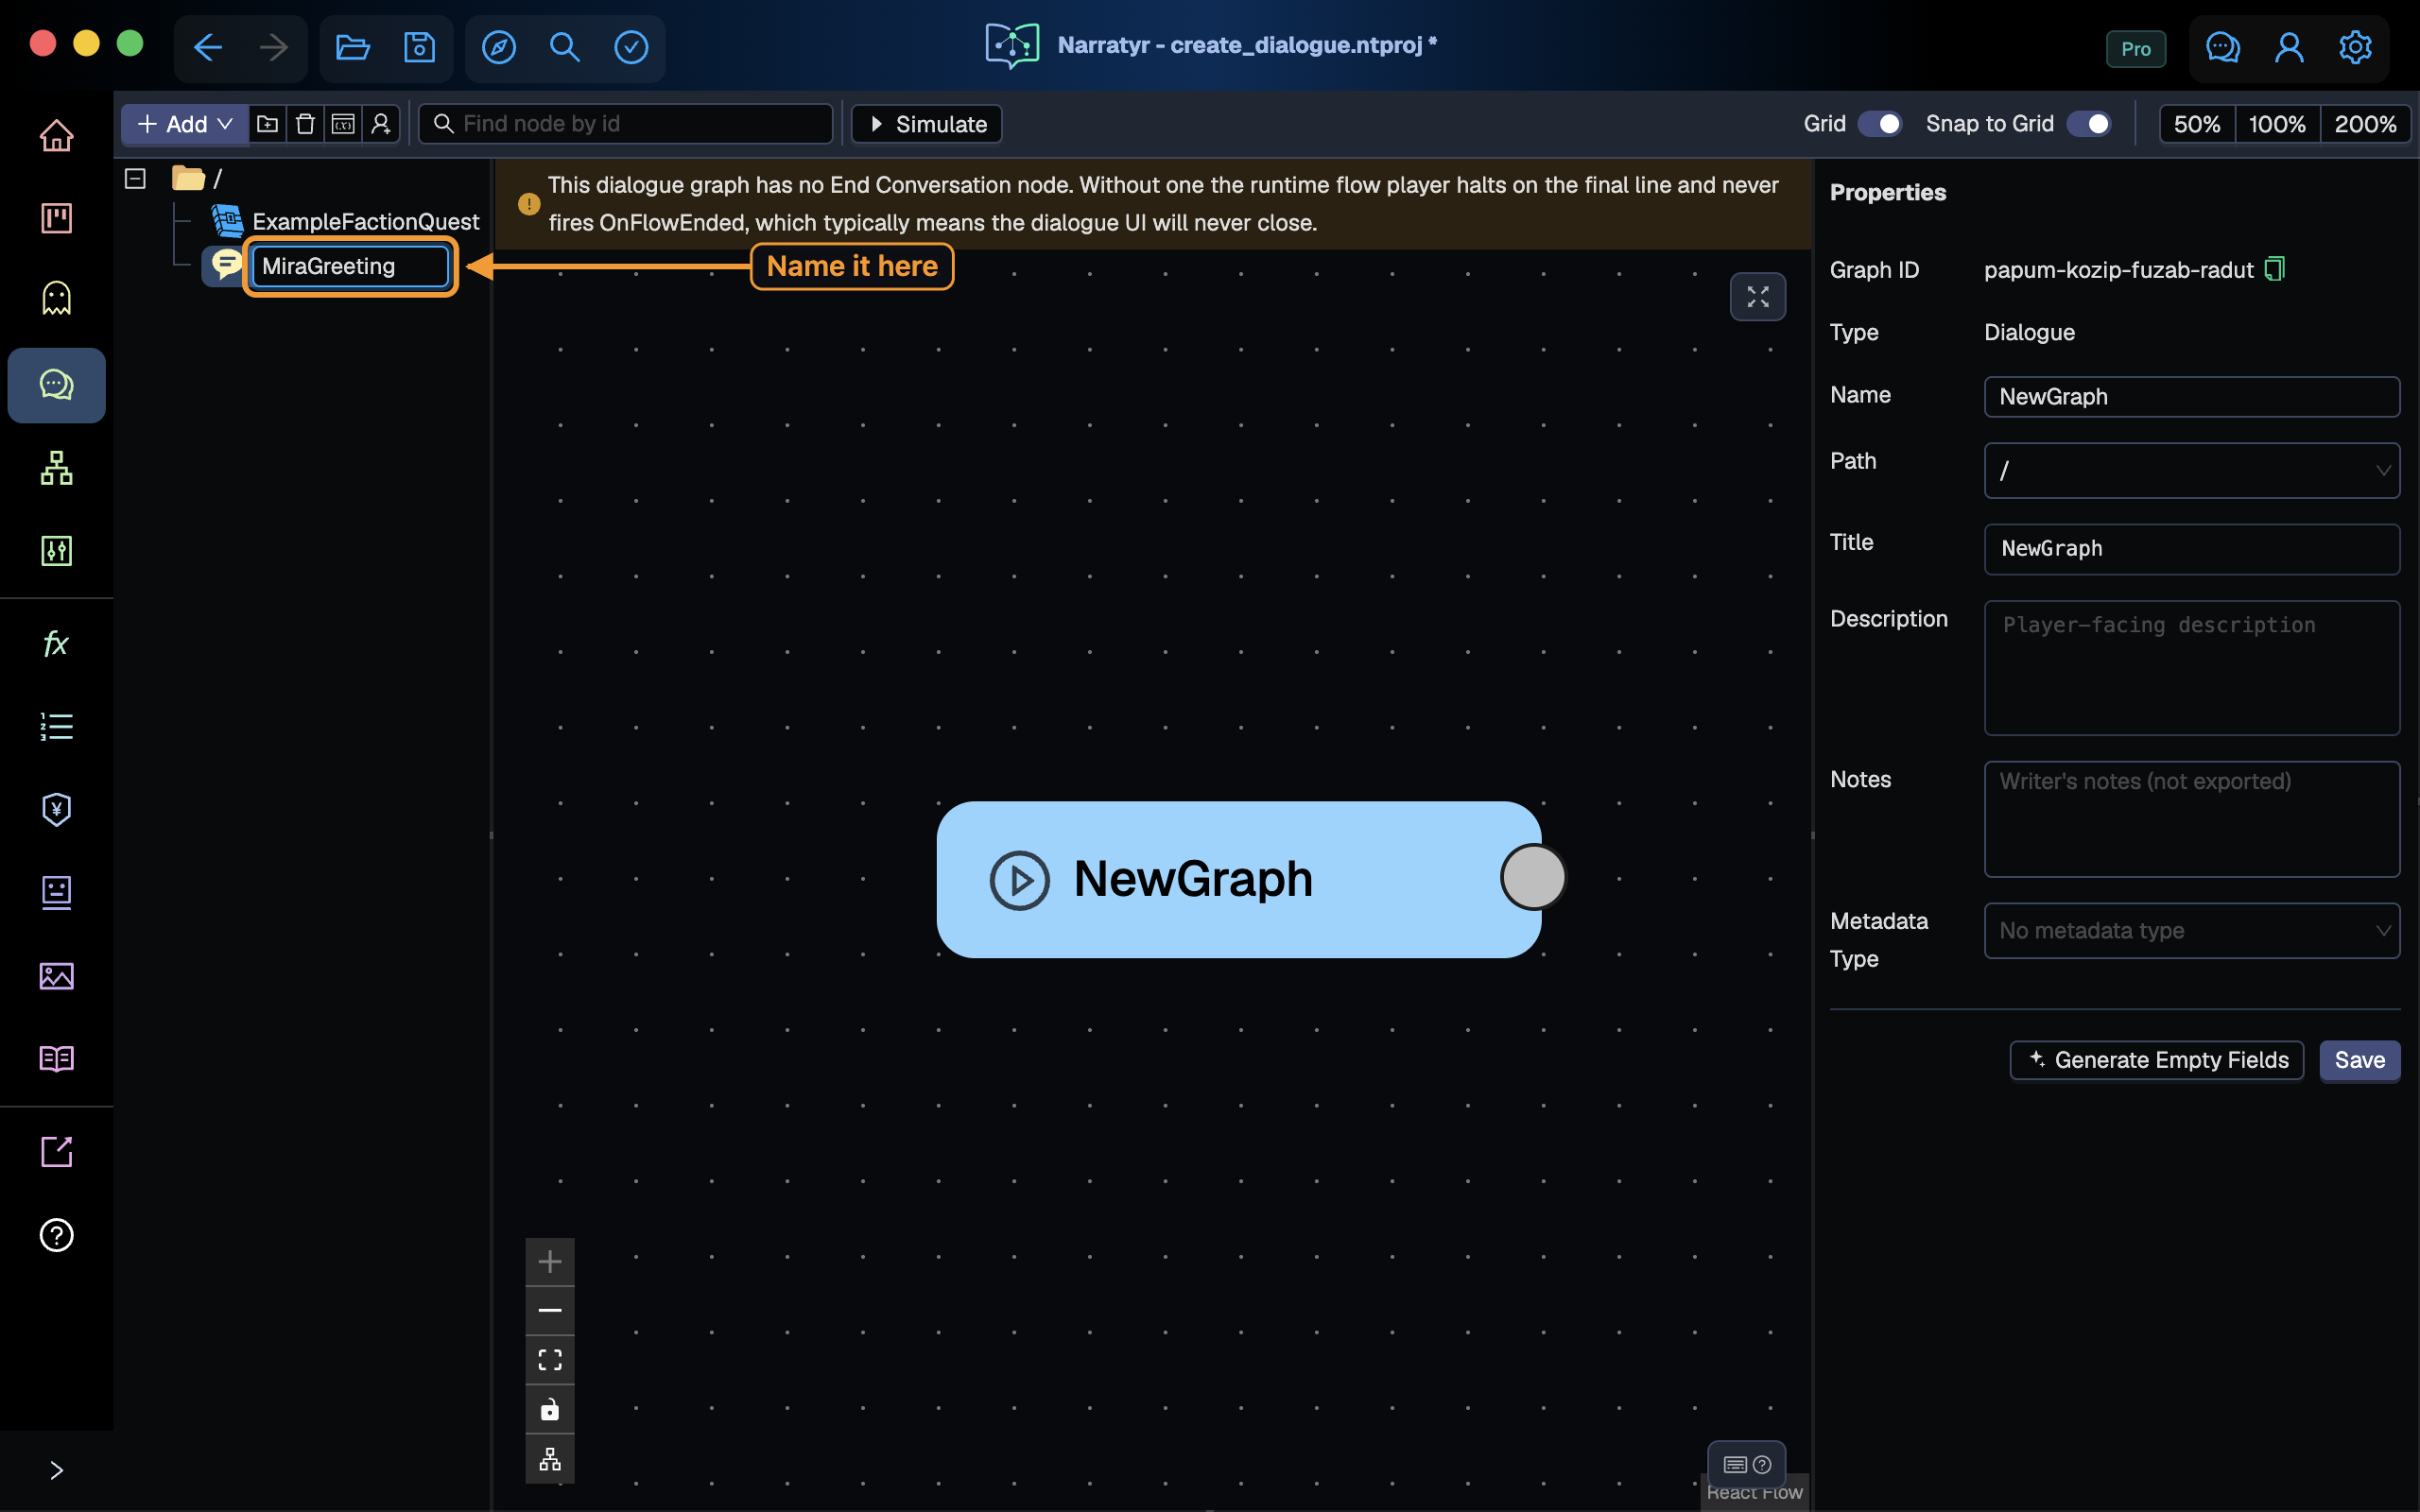
The name acts as the identifier used by game code. It can contain letters, numbers, and underscore characters without spaces.
Add a title and description
Clear the canvas selection to edit graph properties. Enter the Title and Description.
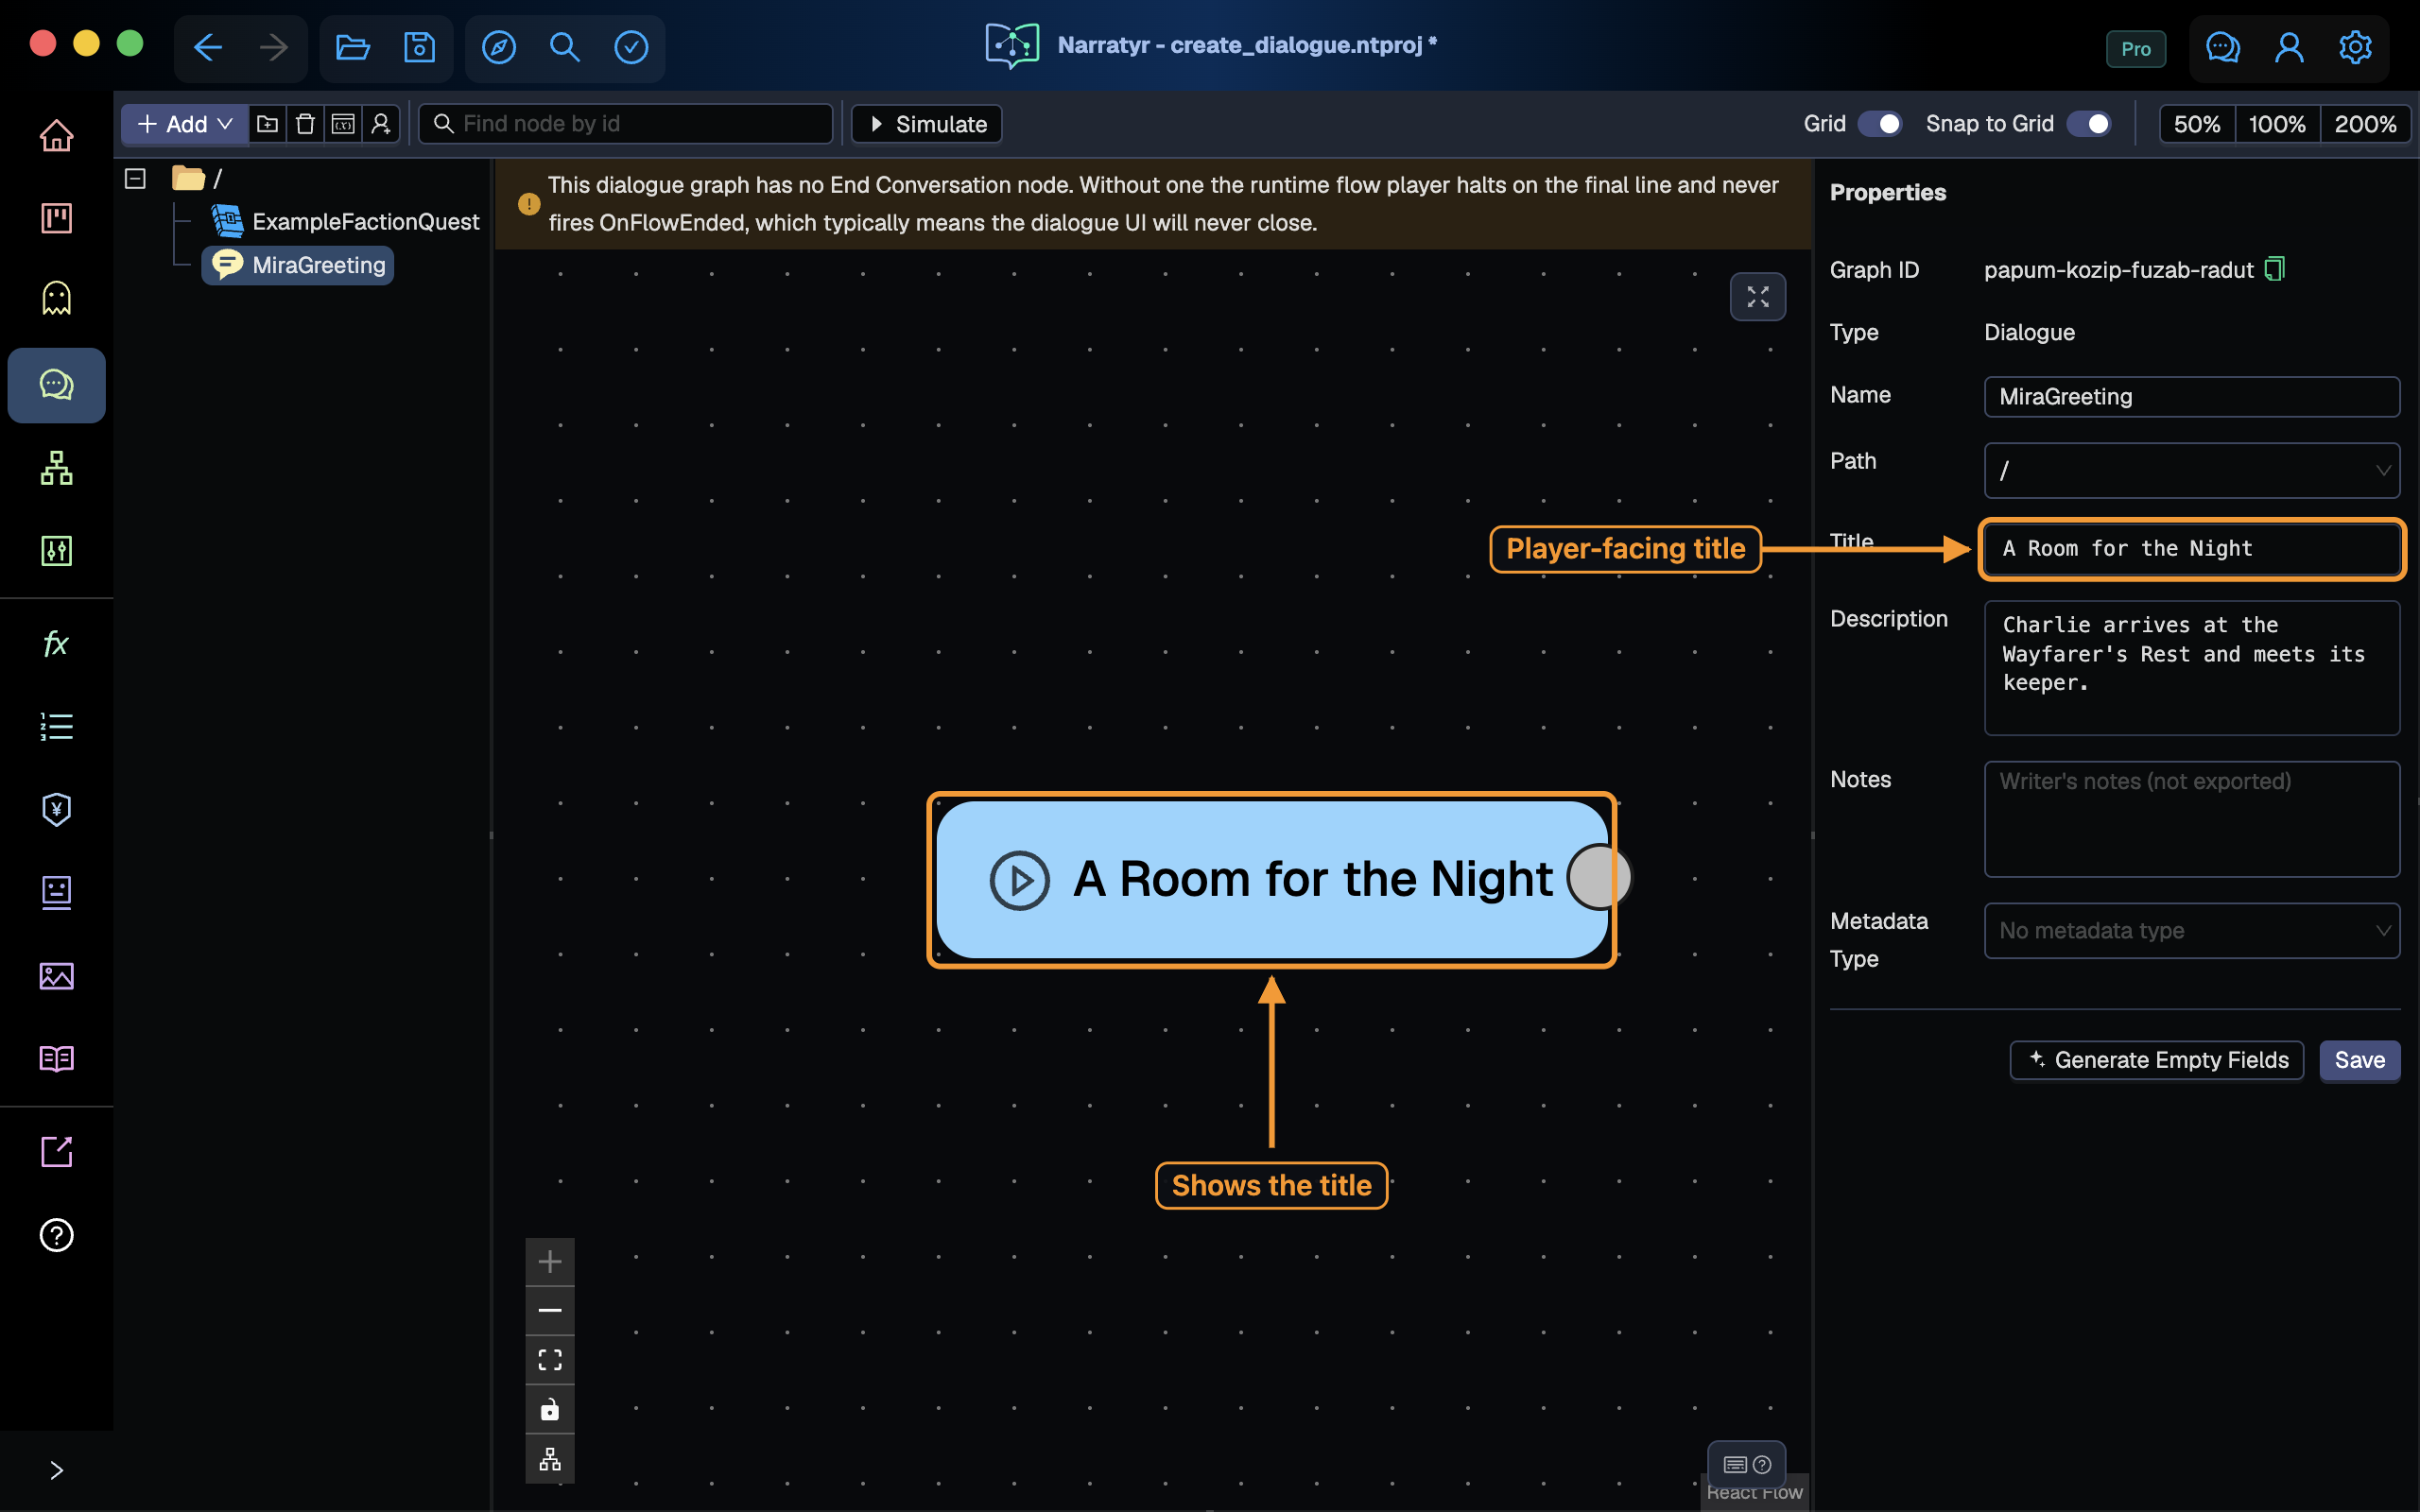
- Name: identifier used by game code.
- Title: player-facing text for a dialogue header or quest log.
- Description: short editor summary of the conversation.
The pale blue Dialogue Entry node marks the start of the graph. Narratyr creates it with the dialogue and prevents its deletion. The node displays the graph title.
Expand the canvas
Select the expand button in the upper-right corner of the canvas to hide the tree and properties panels. Select it again when you need those panels.
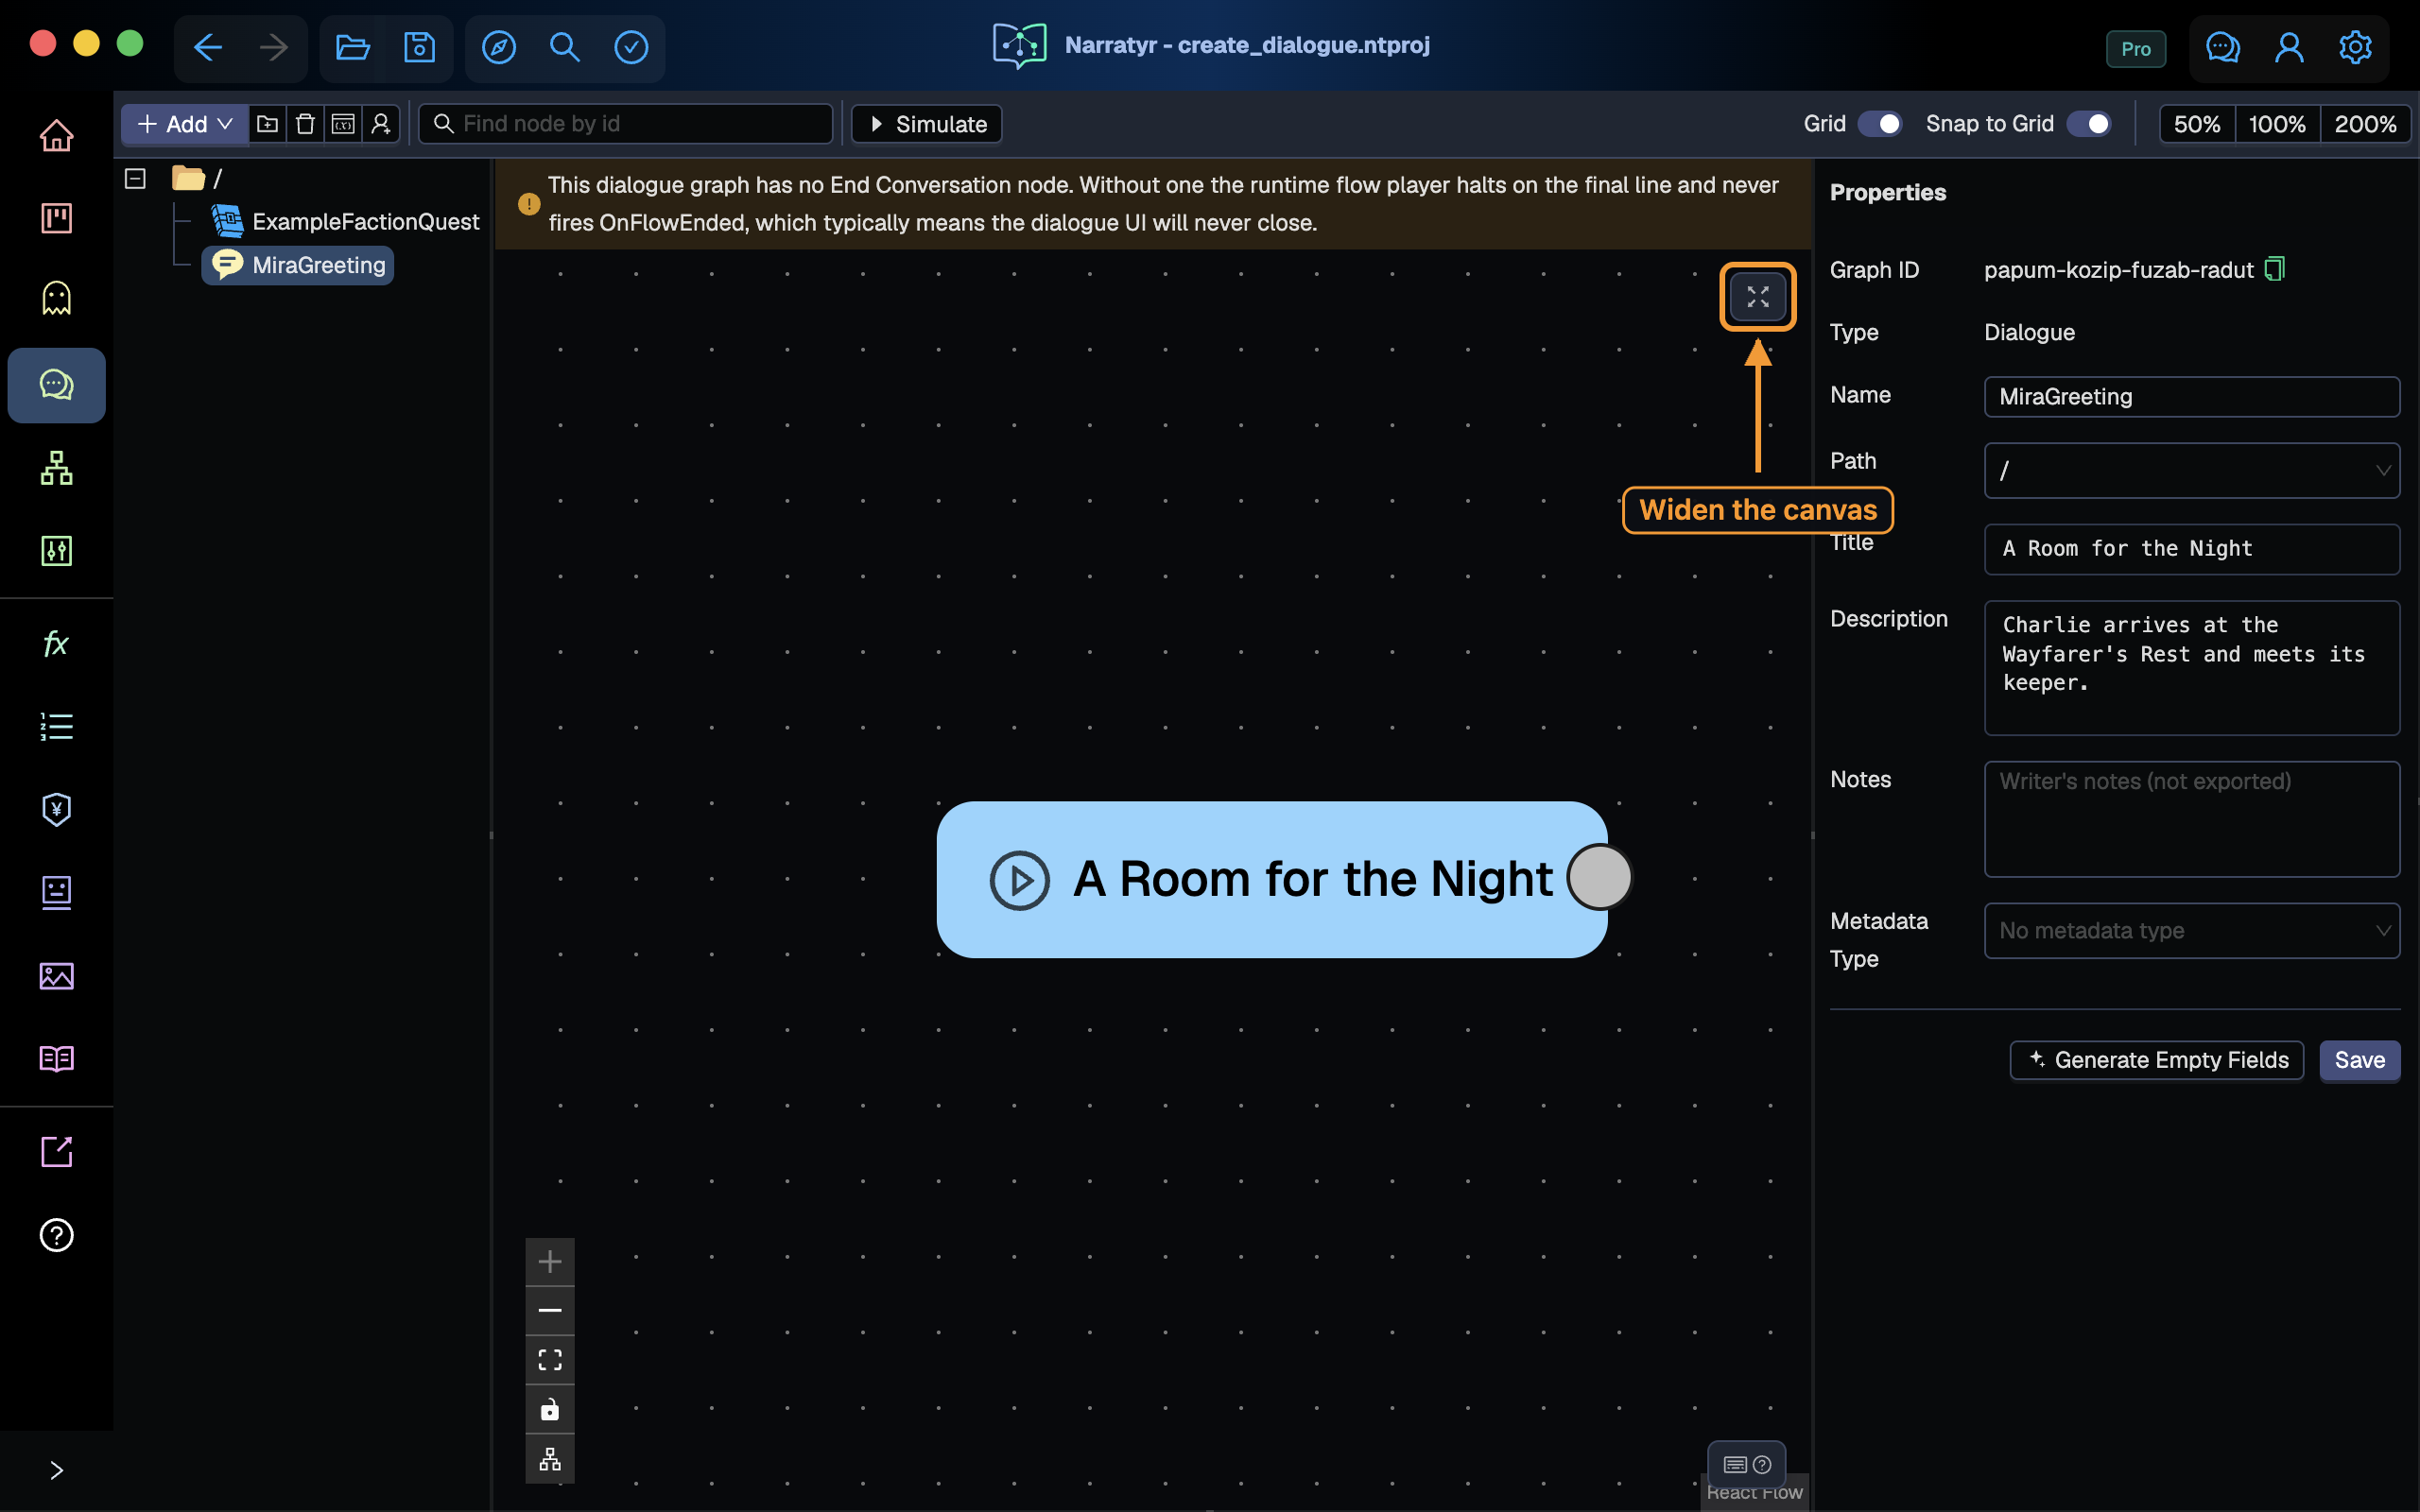
The Shortcuts panel in the lower-right corner lists keys for adding node types at the pointer. You can also right-click the canvas to open the same node menu. The lower-left toolbar provides zoom, frame, and arrangement controls.
Add the first line
Drag from the round handle on the right side of the entry node to an empty area of the canvas. Releasing the connection opens the insert menu. Choose Dialogue Node to create and connect the node.
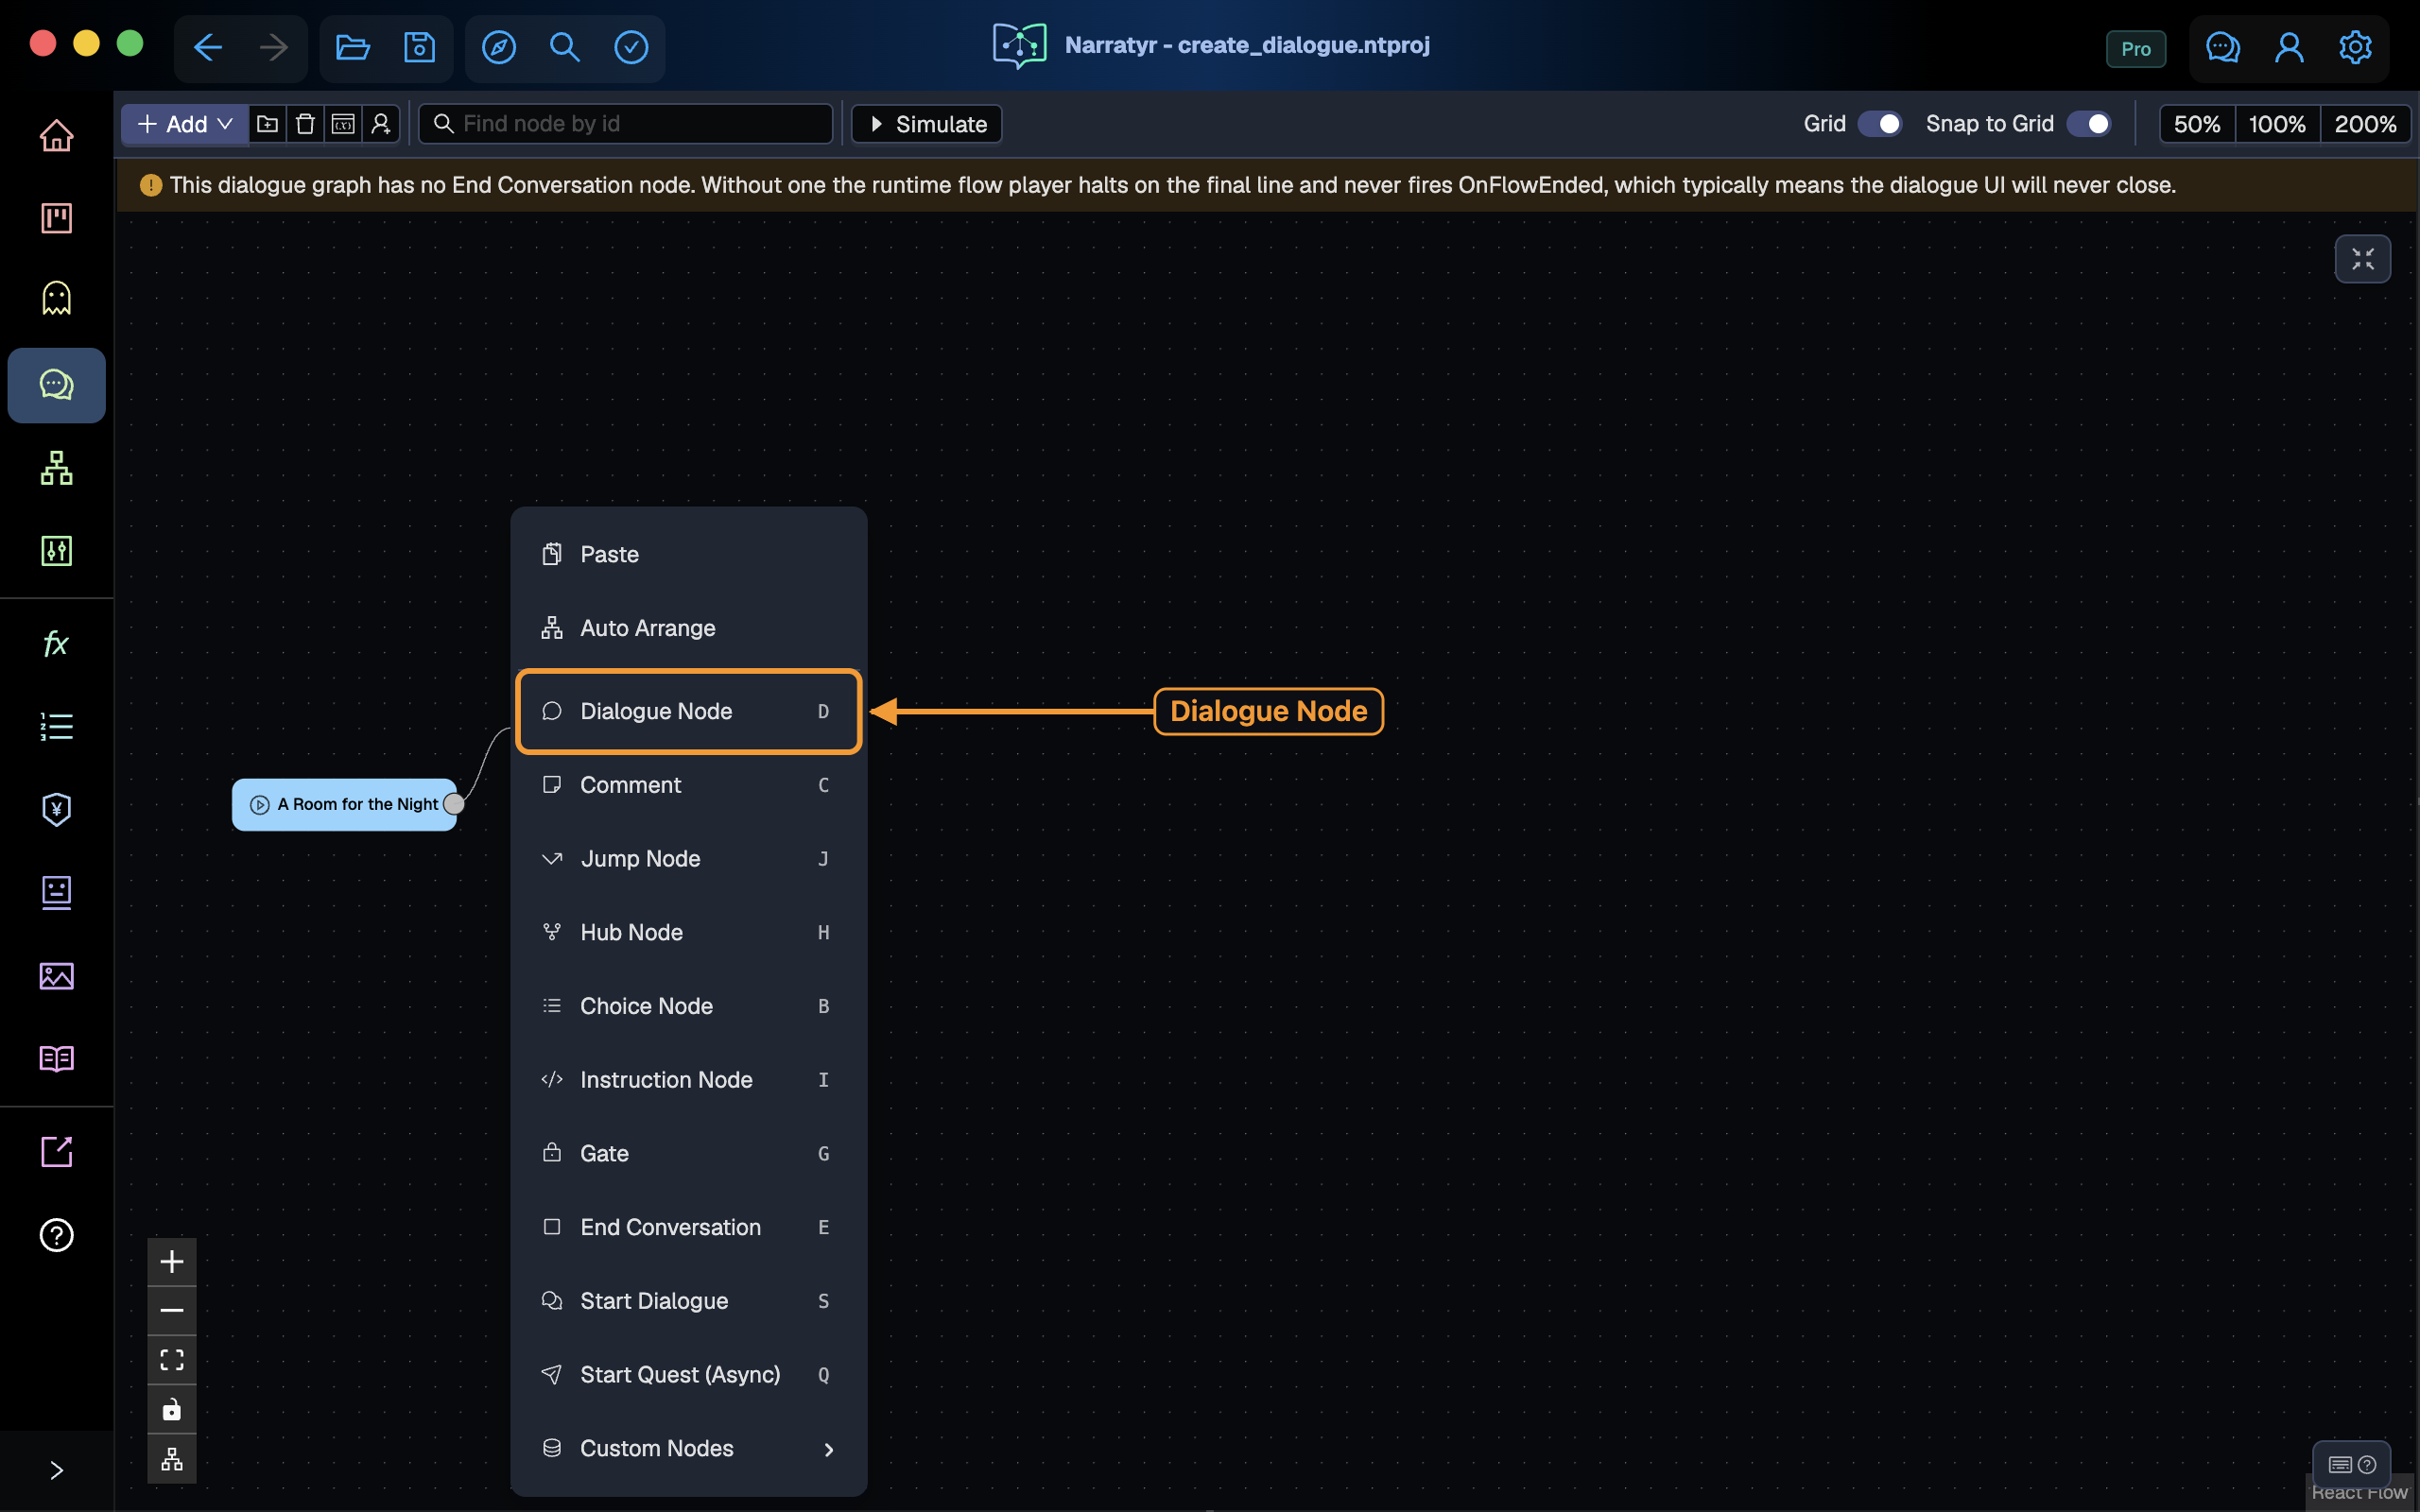
Select the new node and complete its fields.
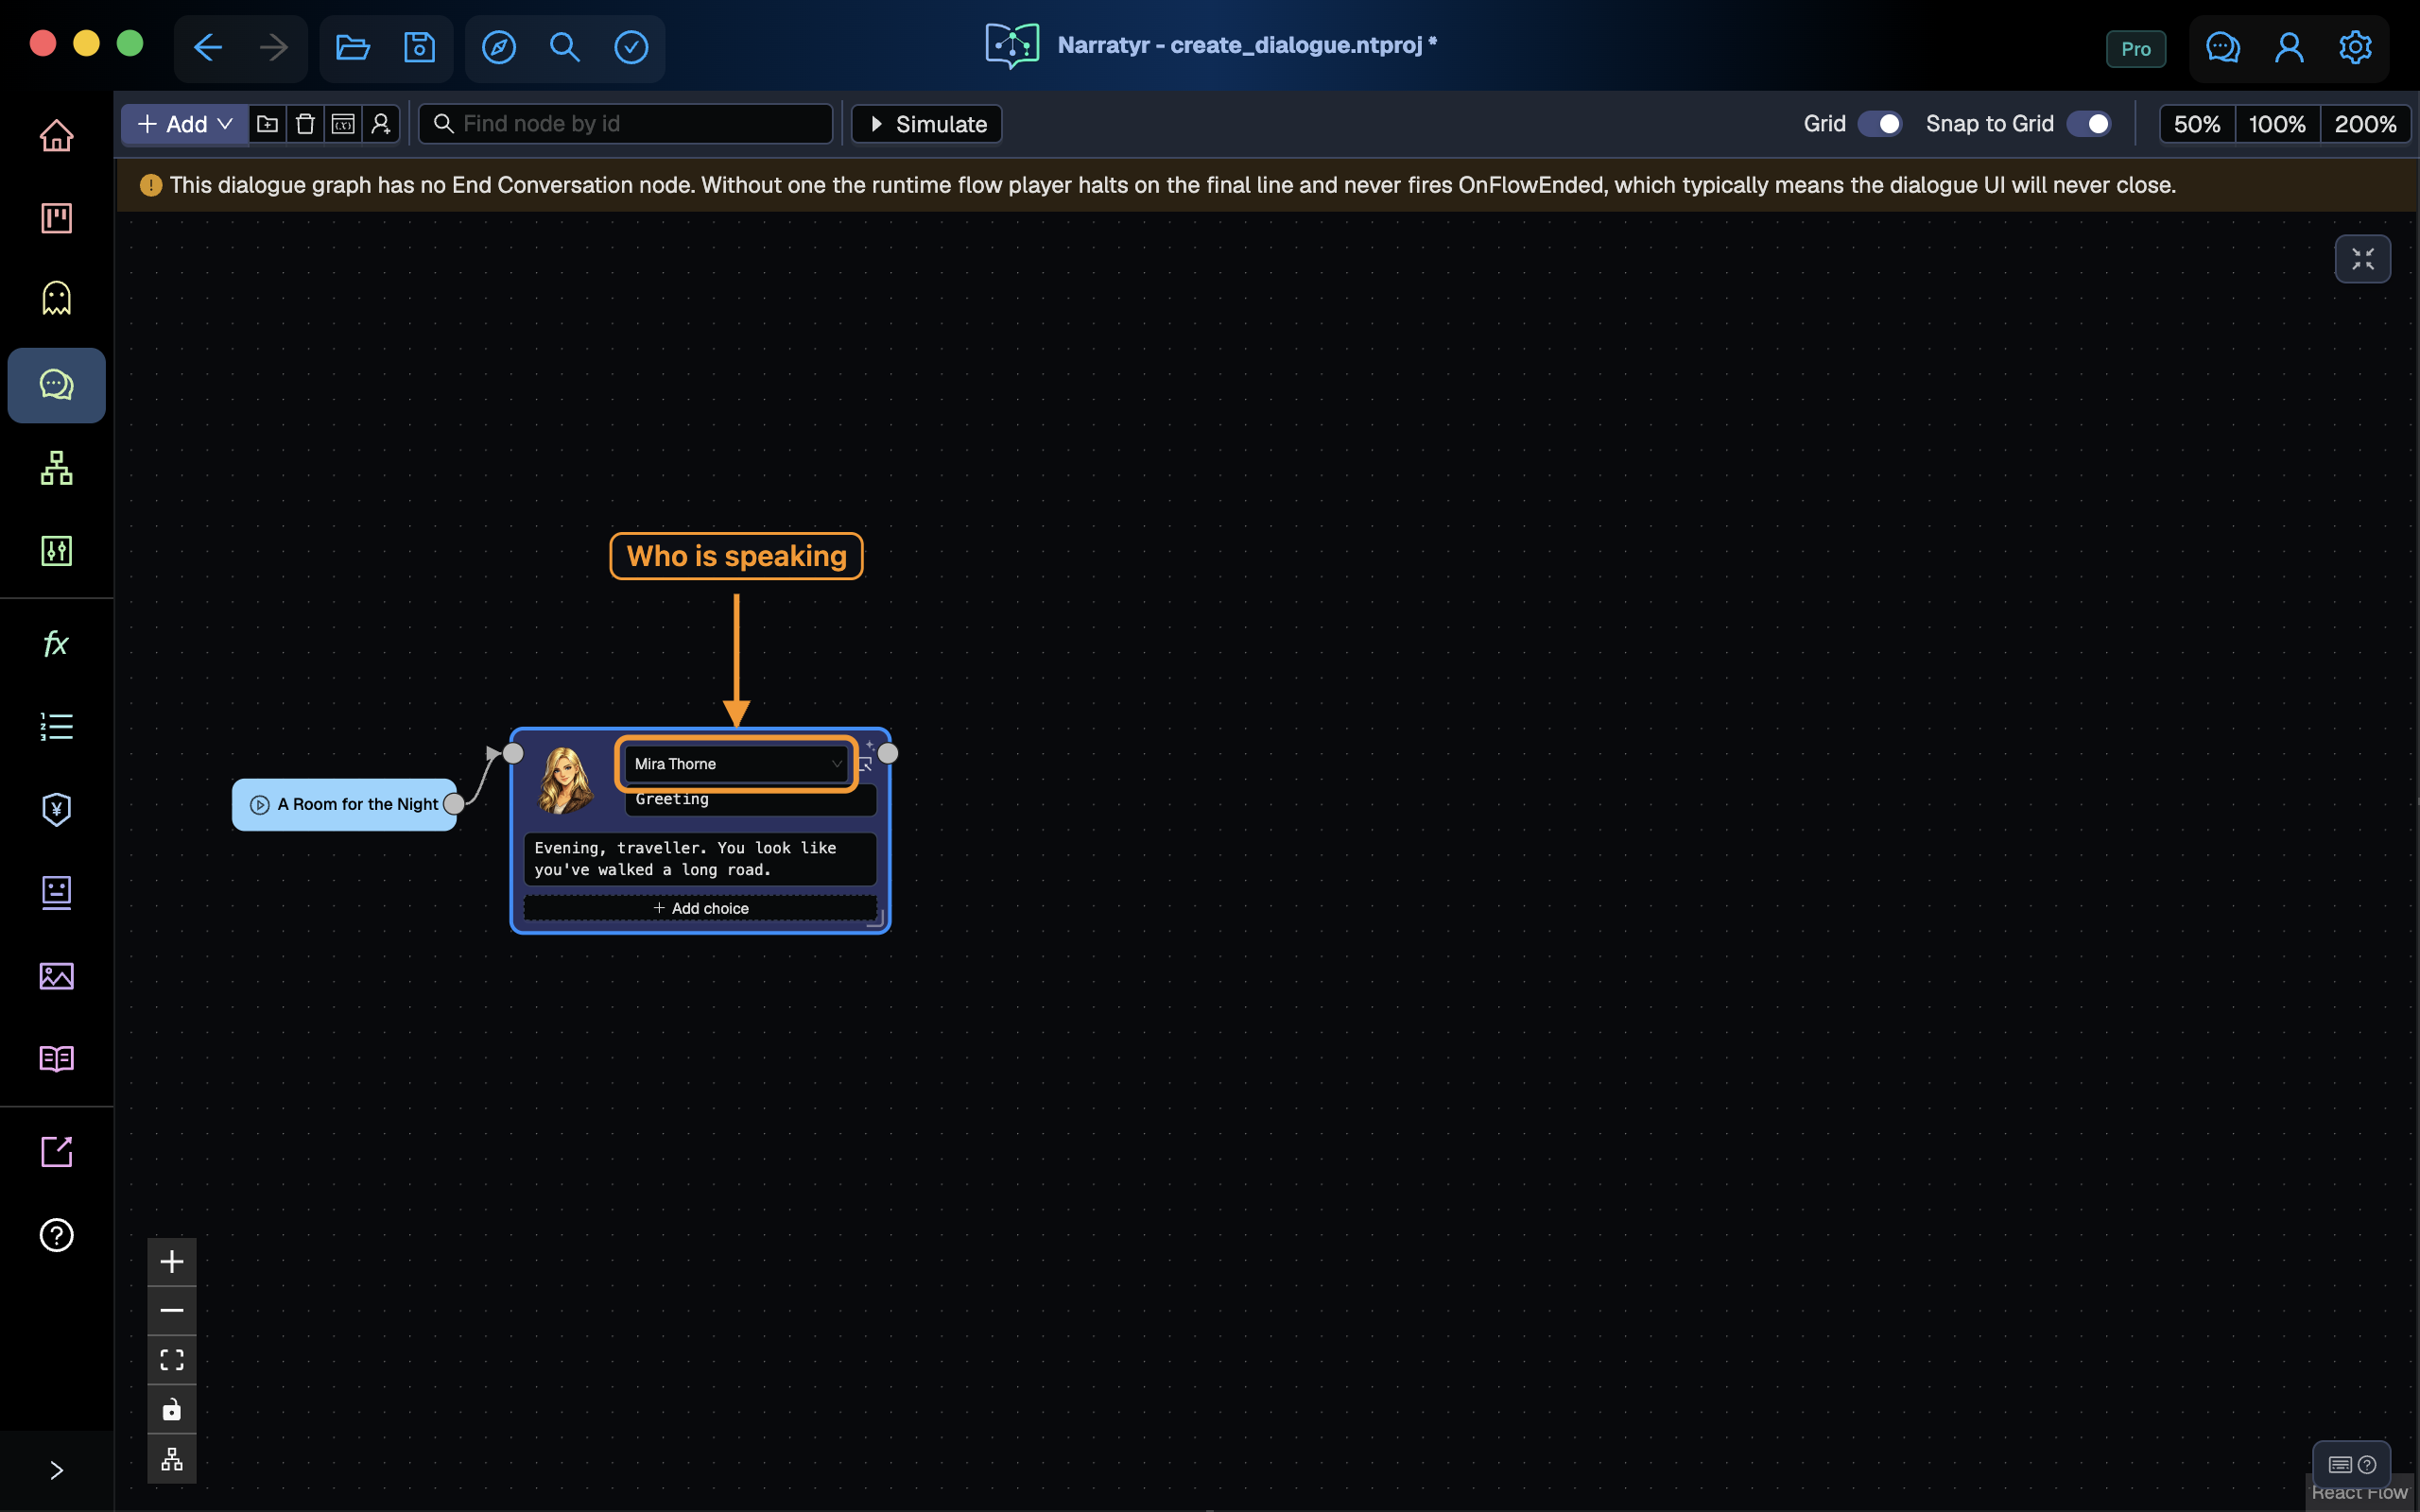
- Speaker: select Mira Thorne. Her portrait appears beside the line.
- Short Text: enter a brief editor label for the node. Players don't see this text.
- Text: enter the full line displayed by the game.
Add player replies
Choices on a Dialogue Node belong to that node's speaker. Create another Dialogue Node from Mira's output and select Charlie as its speaker. Leave the Text field empty, then select + Add choice.
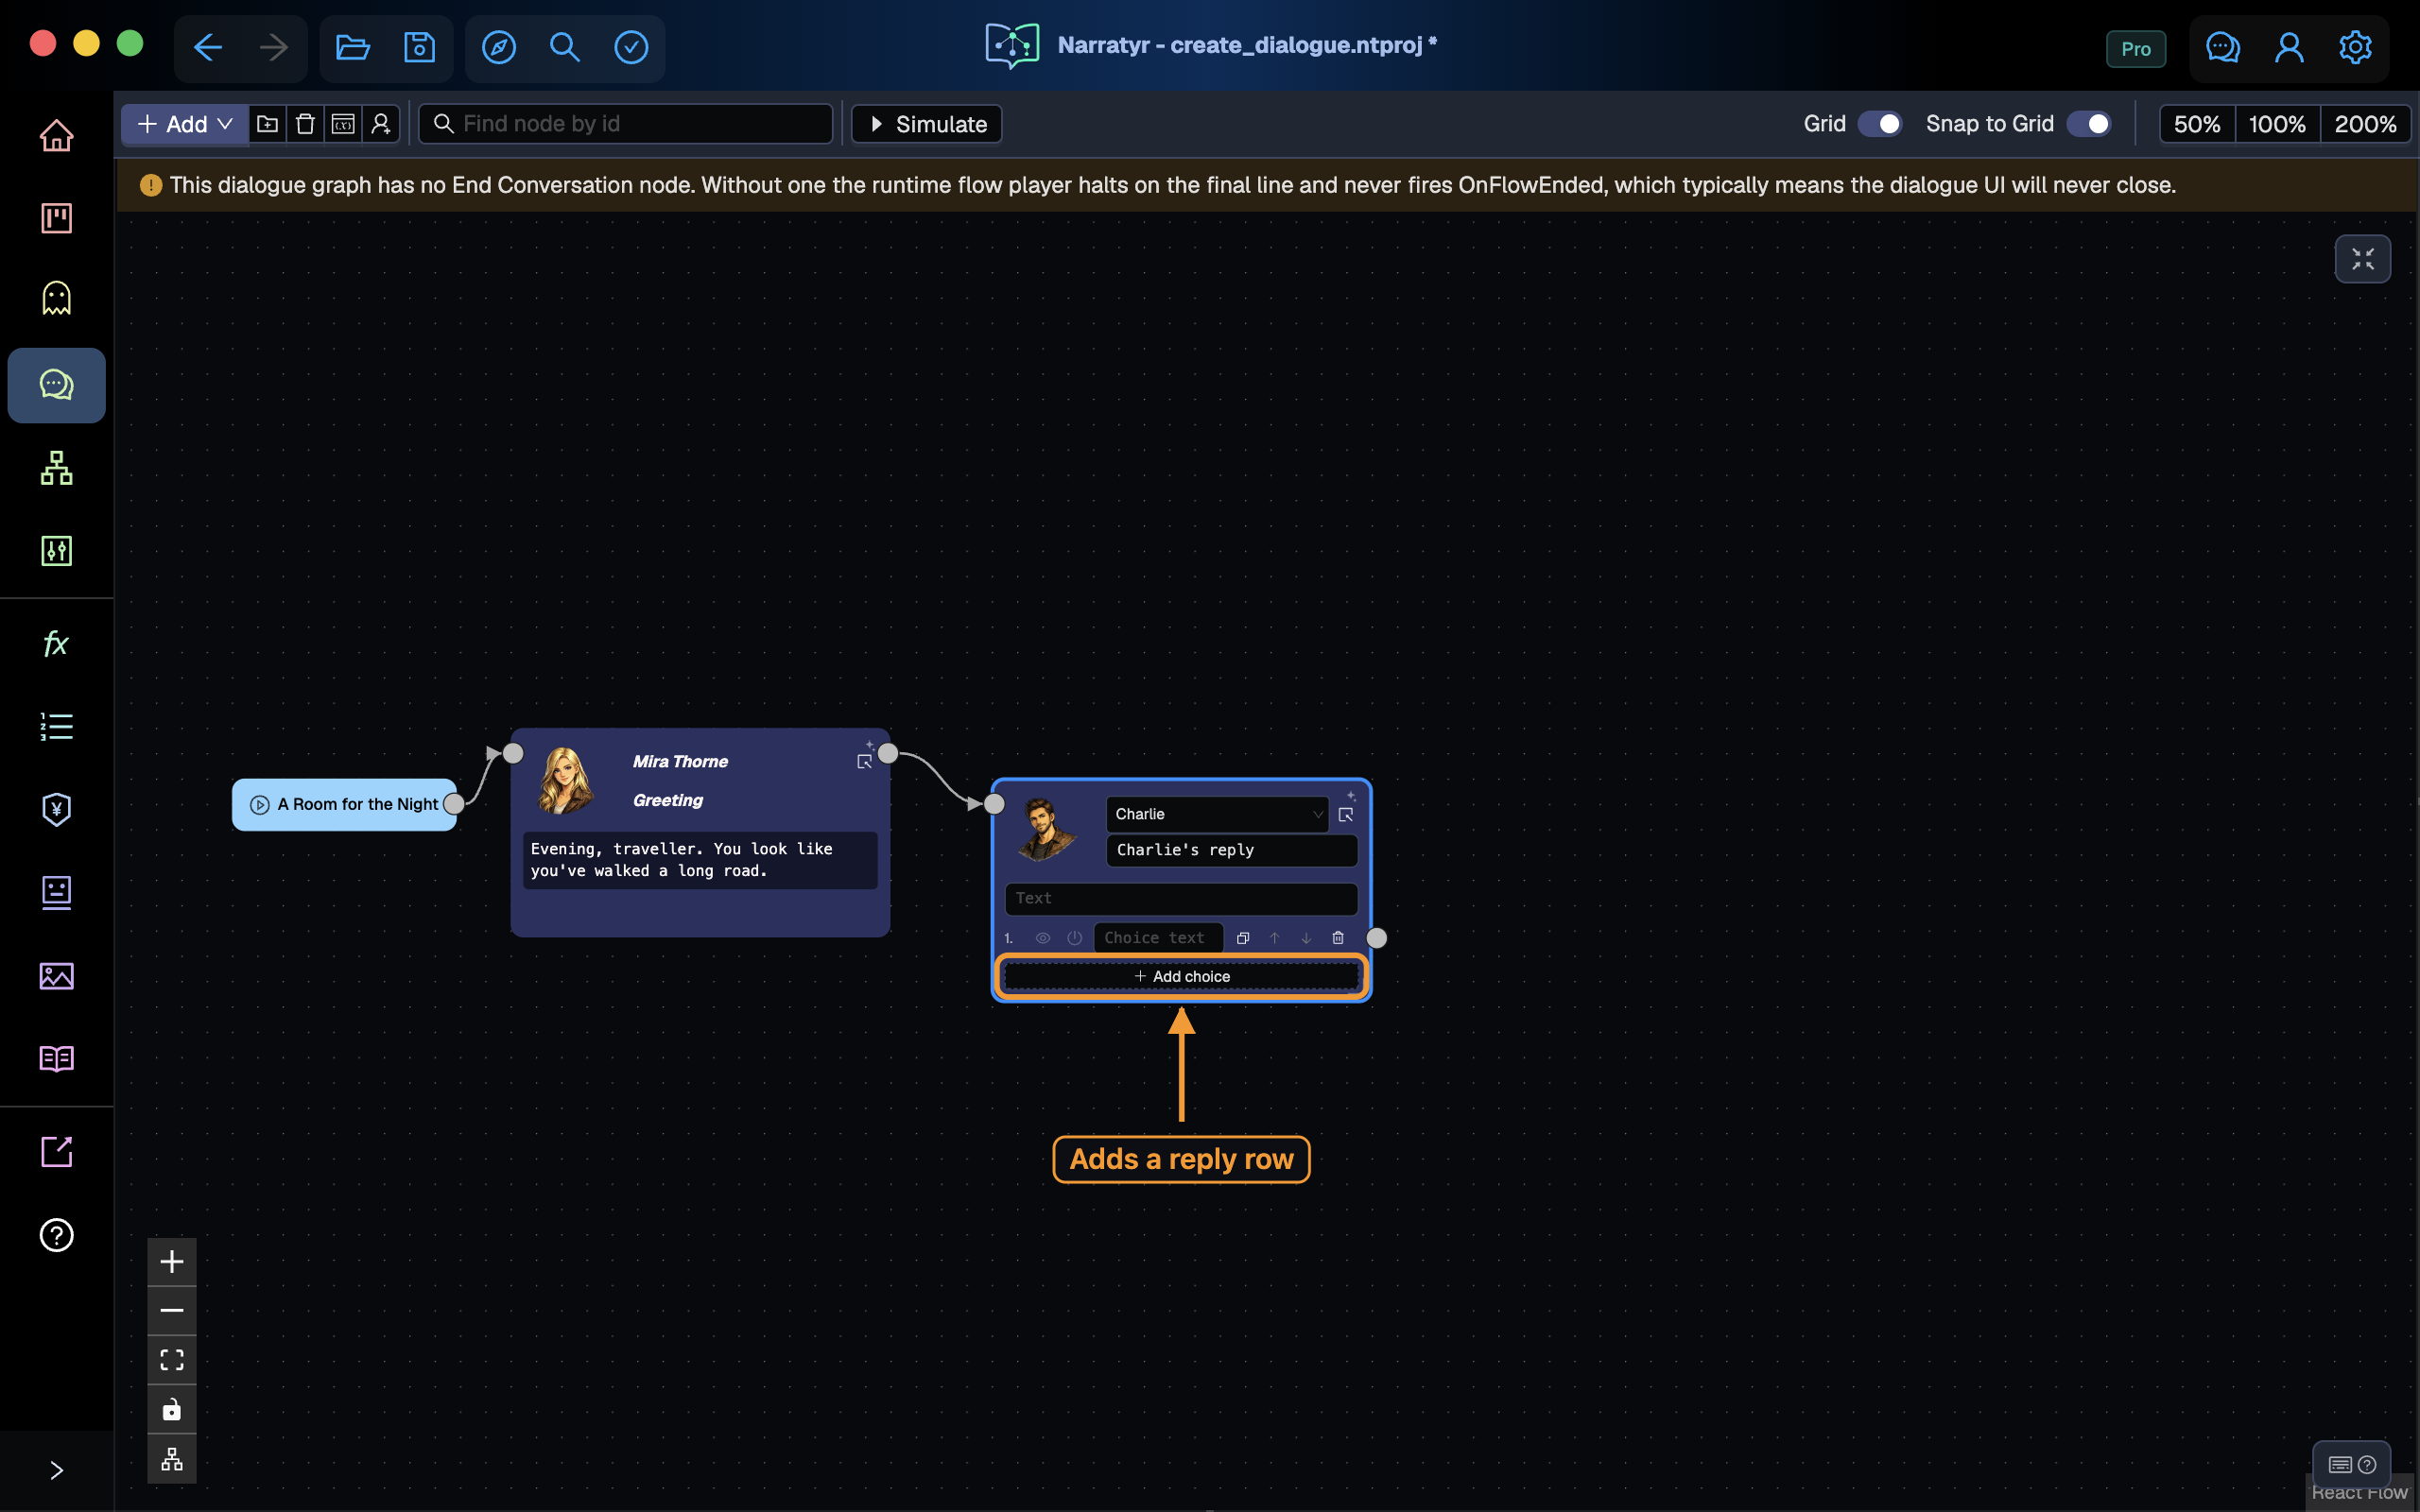
Add three rows and enter a reply in each row. Drag the lower-right resize handle if the node needs more space.
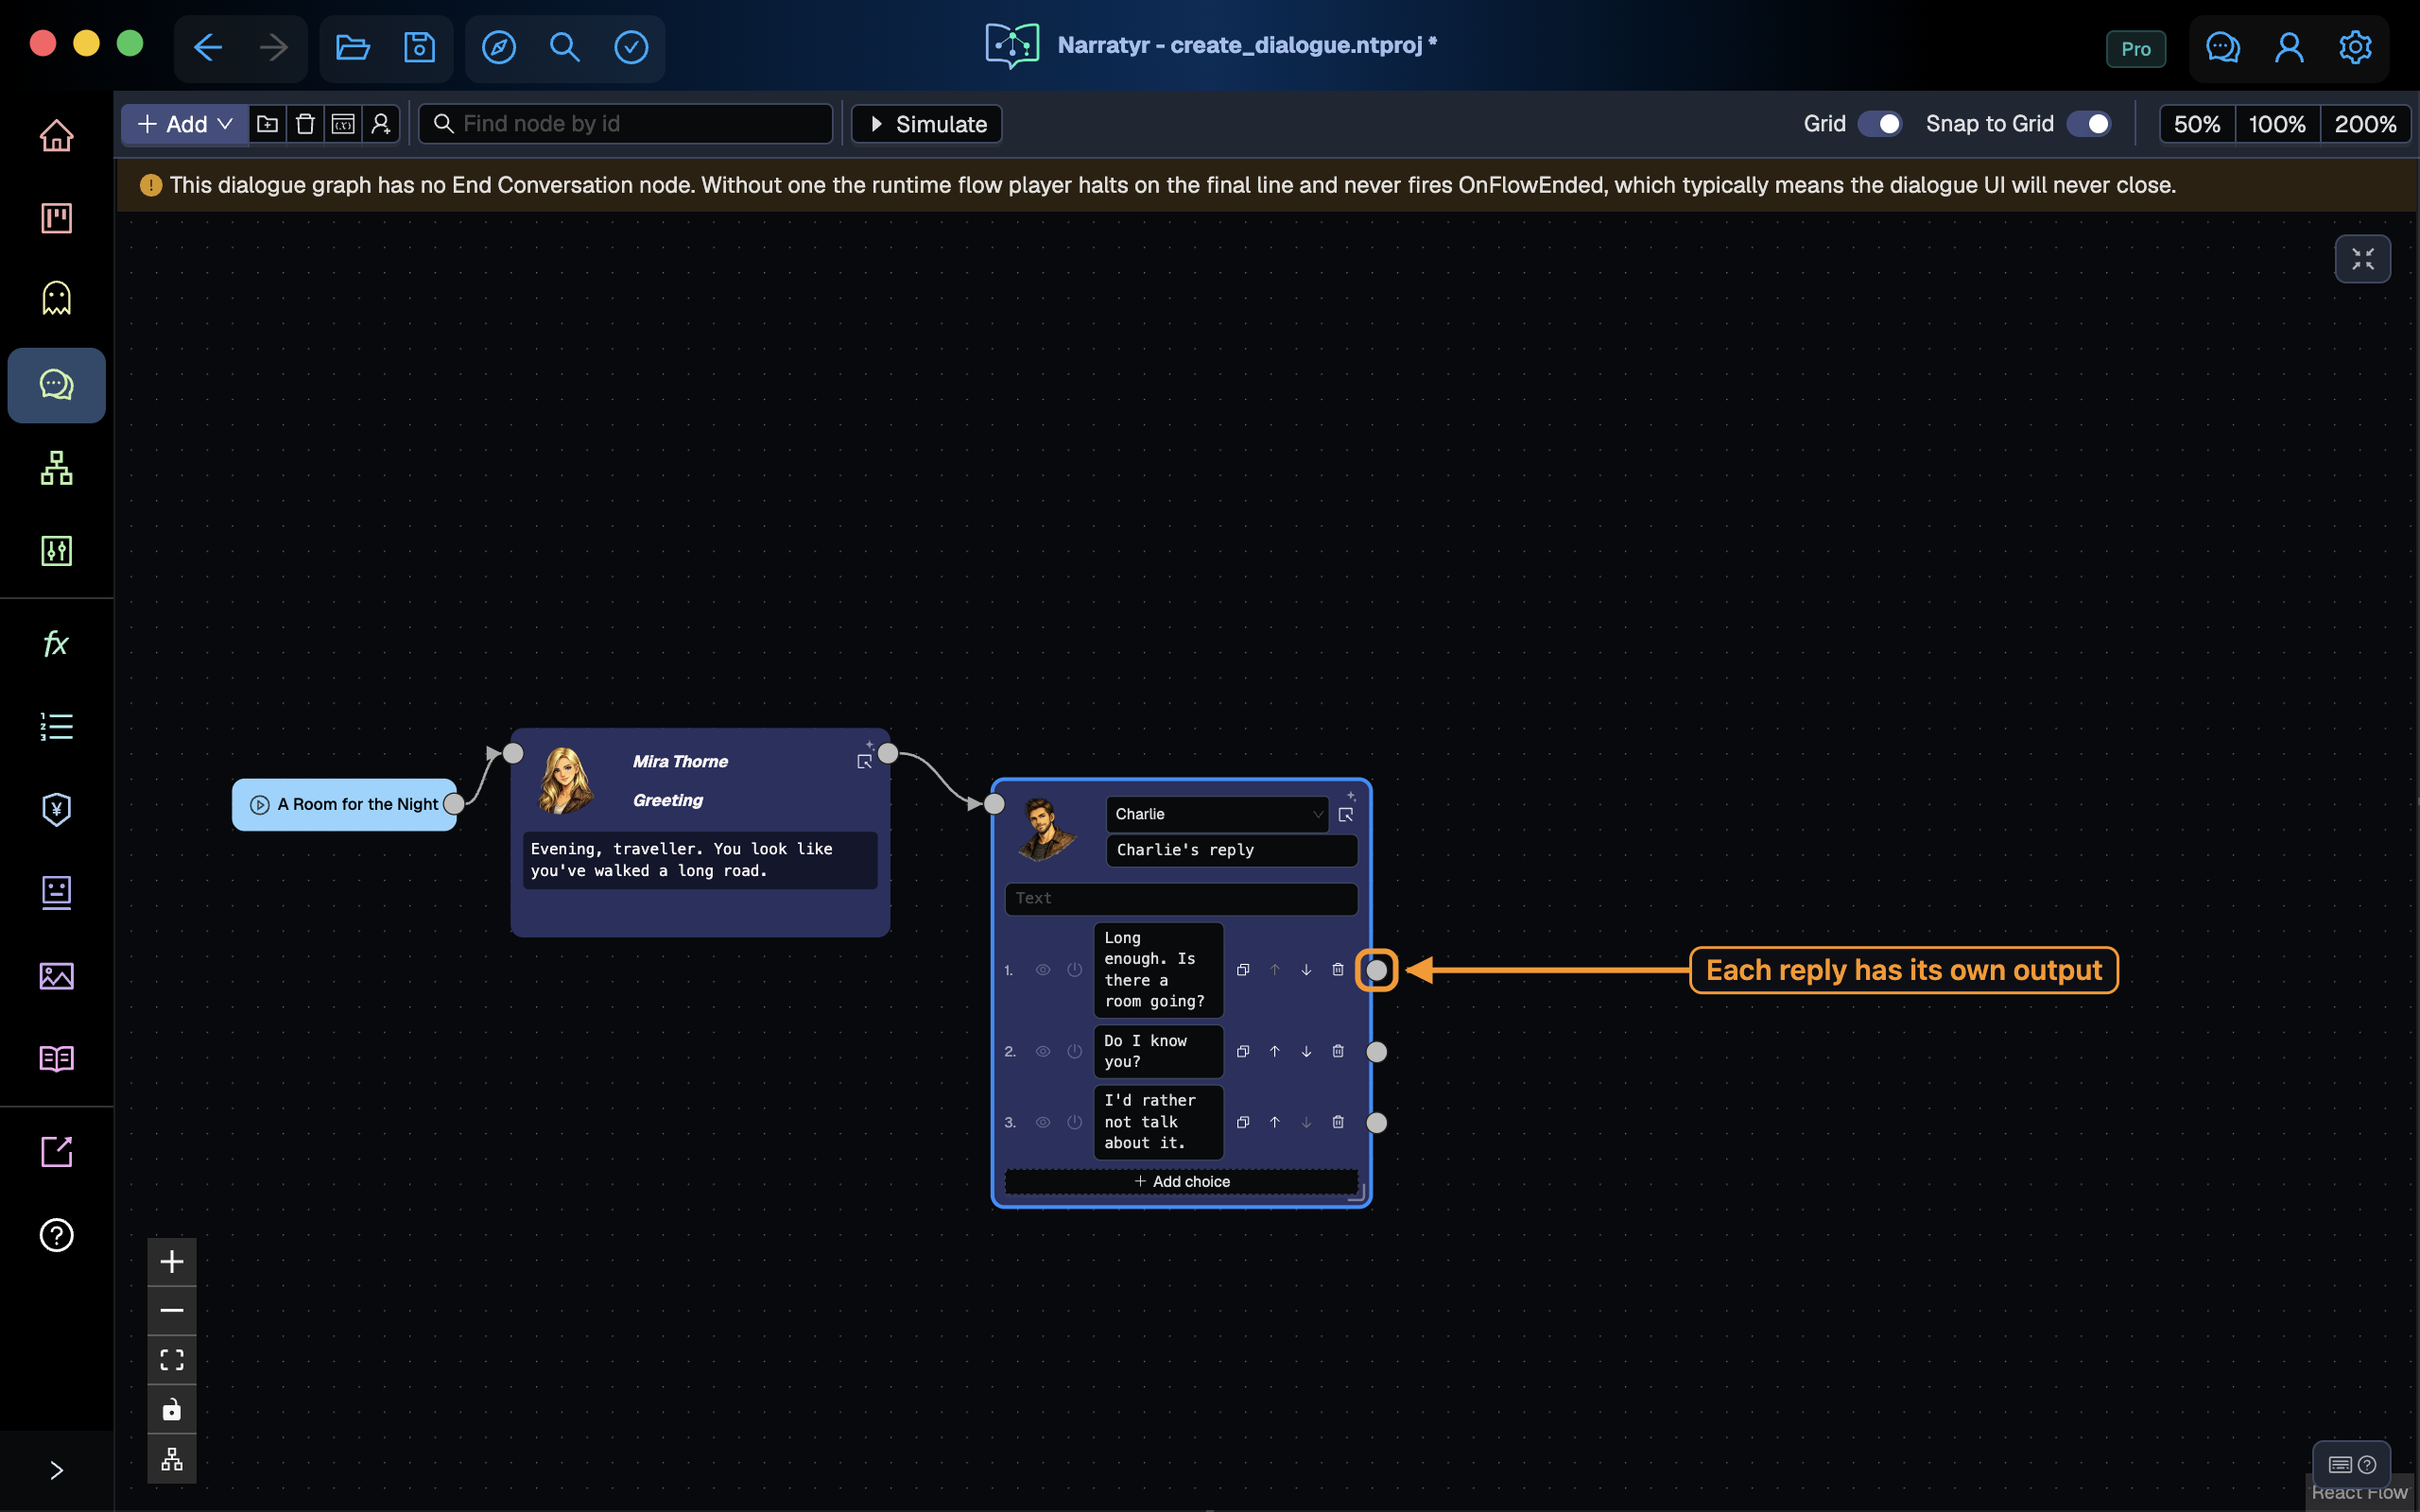
Each choice row has its own output handle. Connections from those handles create separate branches. The icons at the start of a row configure hide and disable conditions. Leave those conditions empty for this tutorial.
Choice text. Add a spoken lead-in to the Text field on Charlie's node. Use the separate Choice Node for choices that occur outside a spoken exchange.
Add response nodes
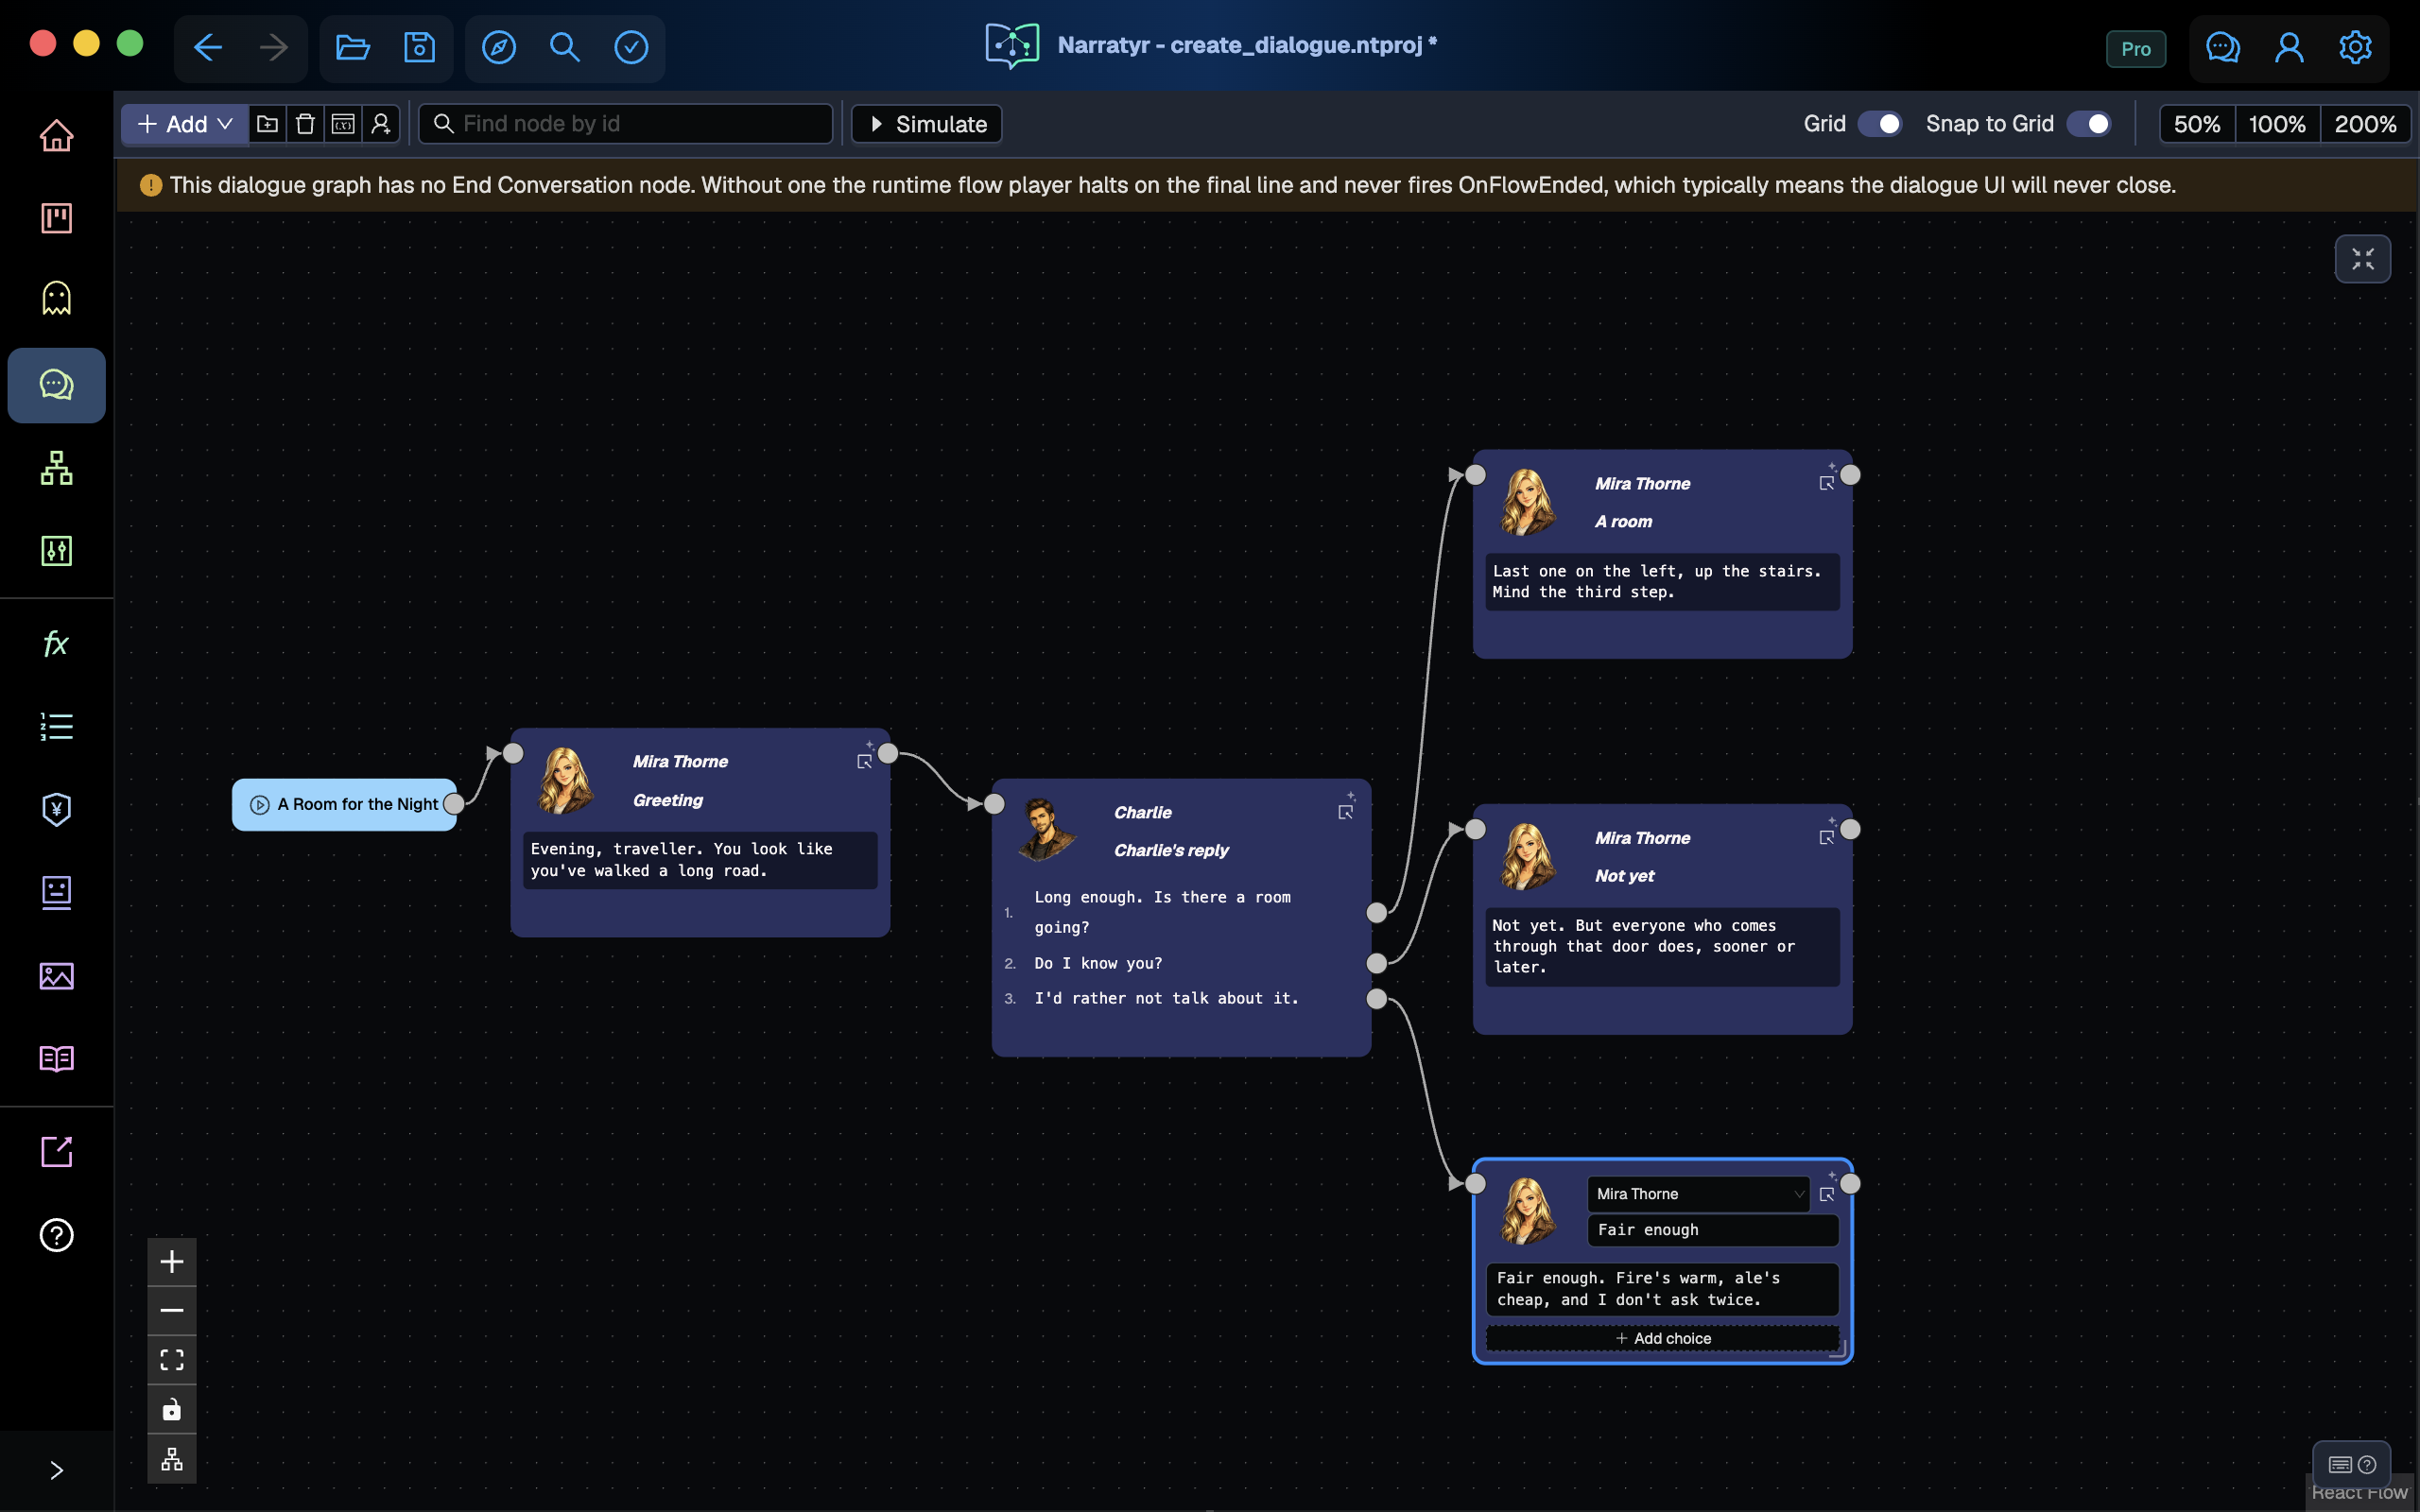
Drag from the first choice handle to an empty canvas area and add a Dialogue Node. Set Mira as the speaker and enter her response. The connection remains attached to that specific reply.
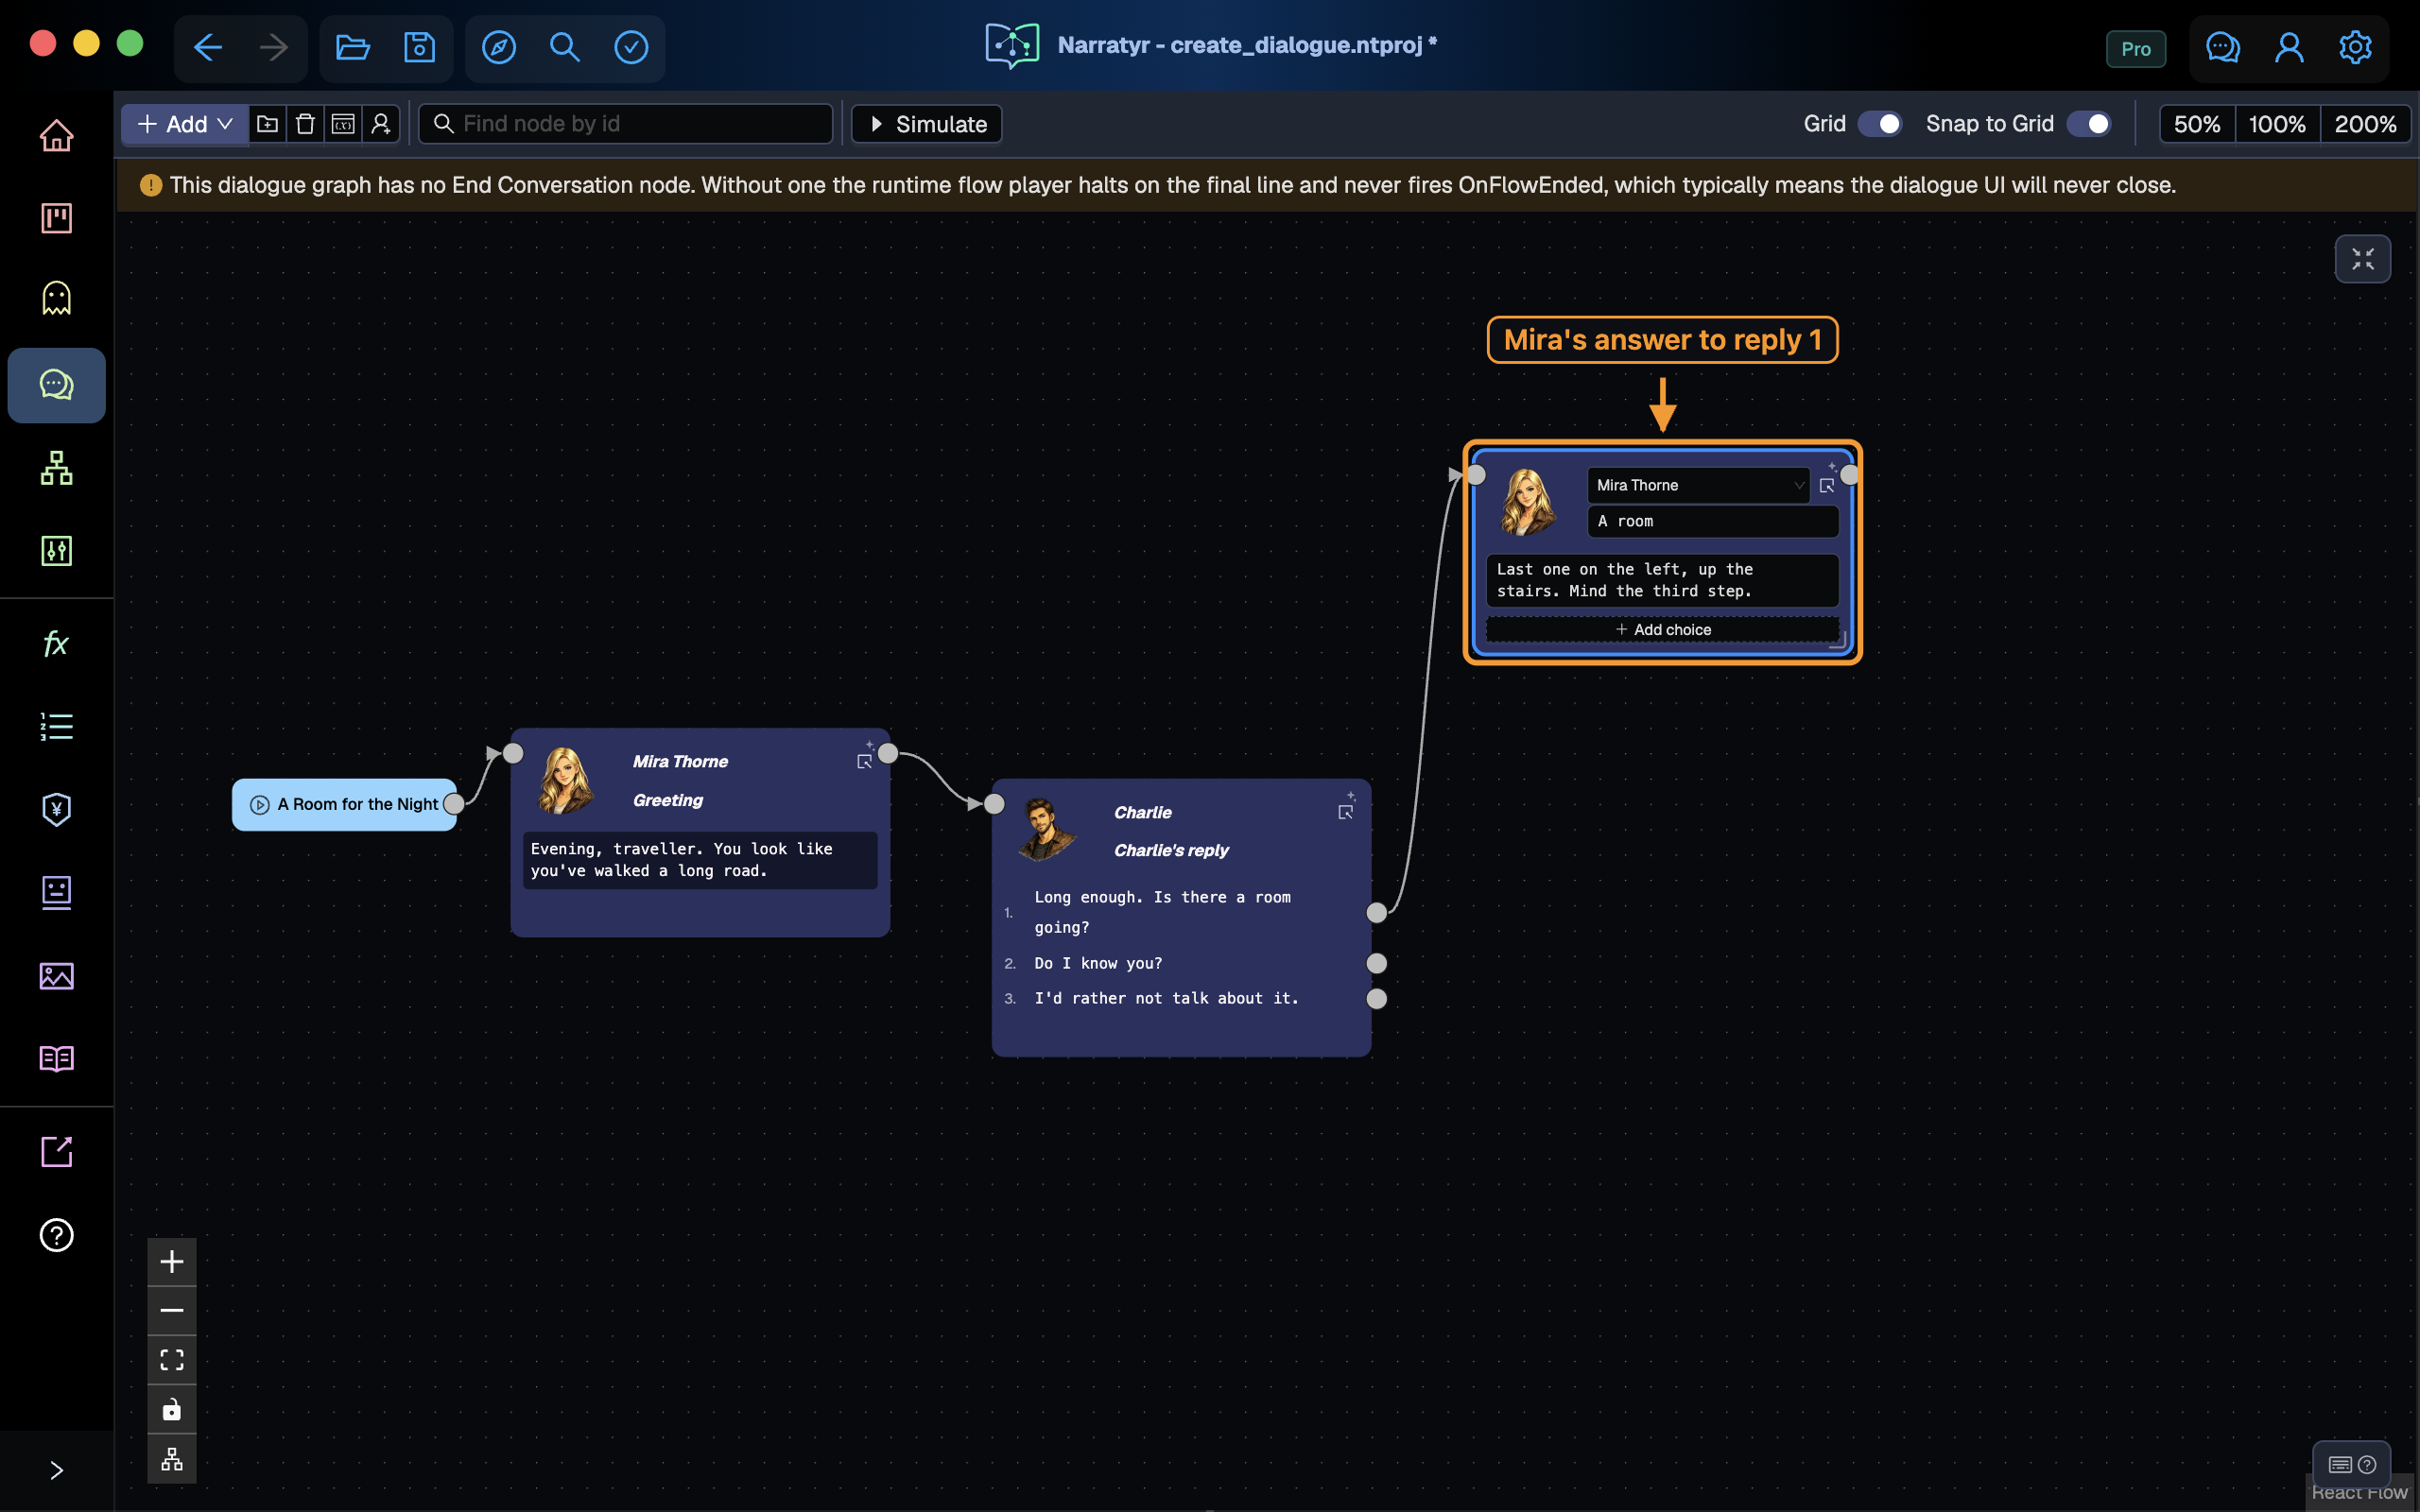
Repeat the process for the other replies.
End the conversation
Drag from one answer to an empty area and add End Conversation. Connect the other answer nodes to the same ending.
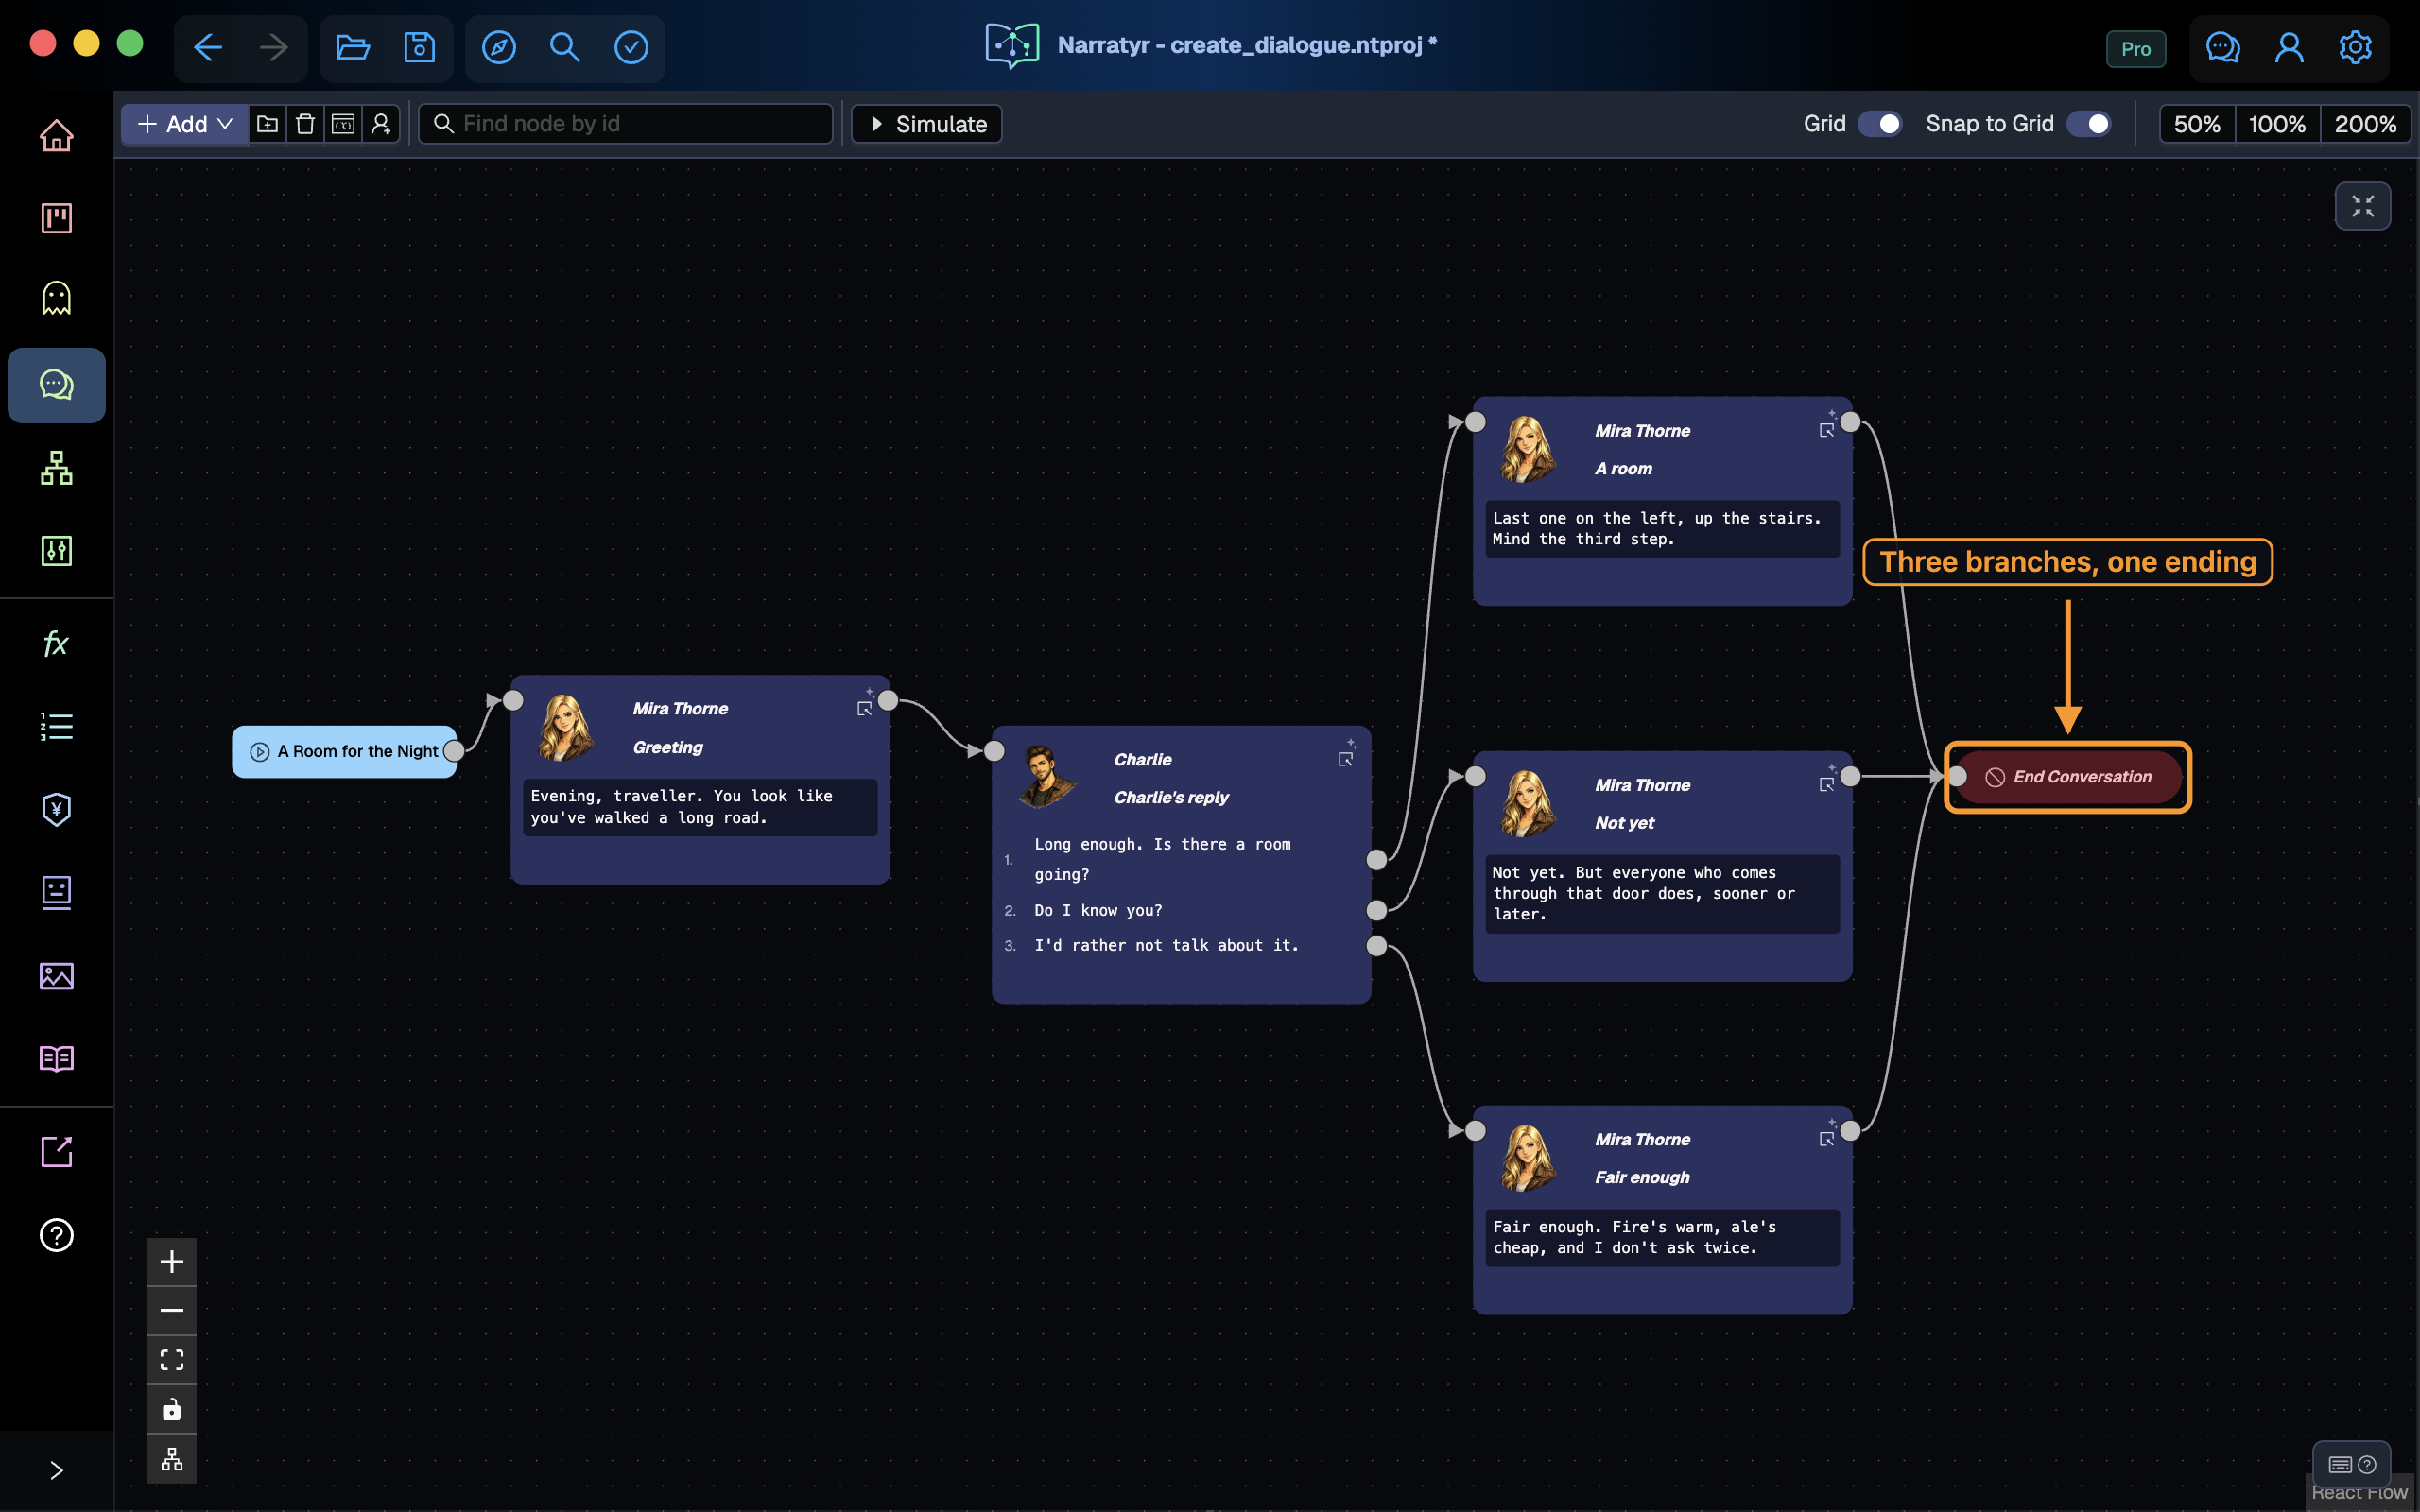
The warning at the top of the canvas disappears after the graph has an ending. Without an End Conversation node, the runtime doesn't tell the game to close the conversation.
Arrange the graph
Select the last button on the lower-left toolbar to arrange the graph. The same command appears as Auto Arrange in the canvas menu and uses ⇧⌘A.
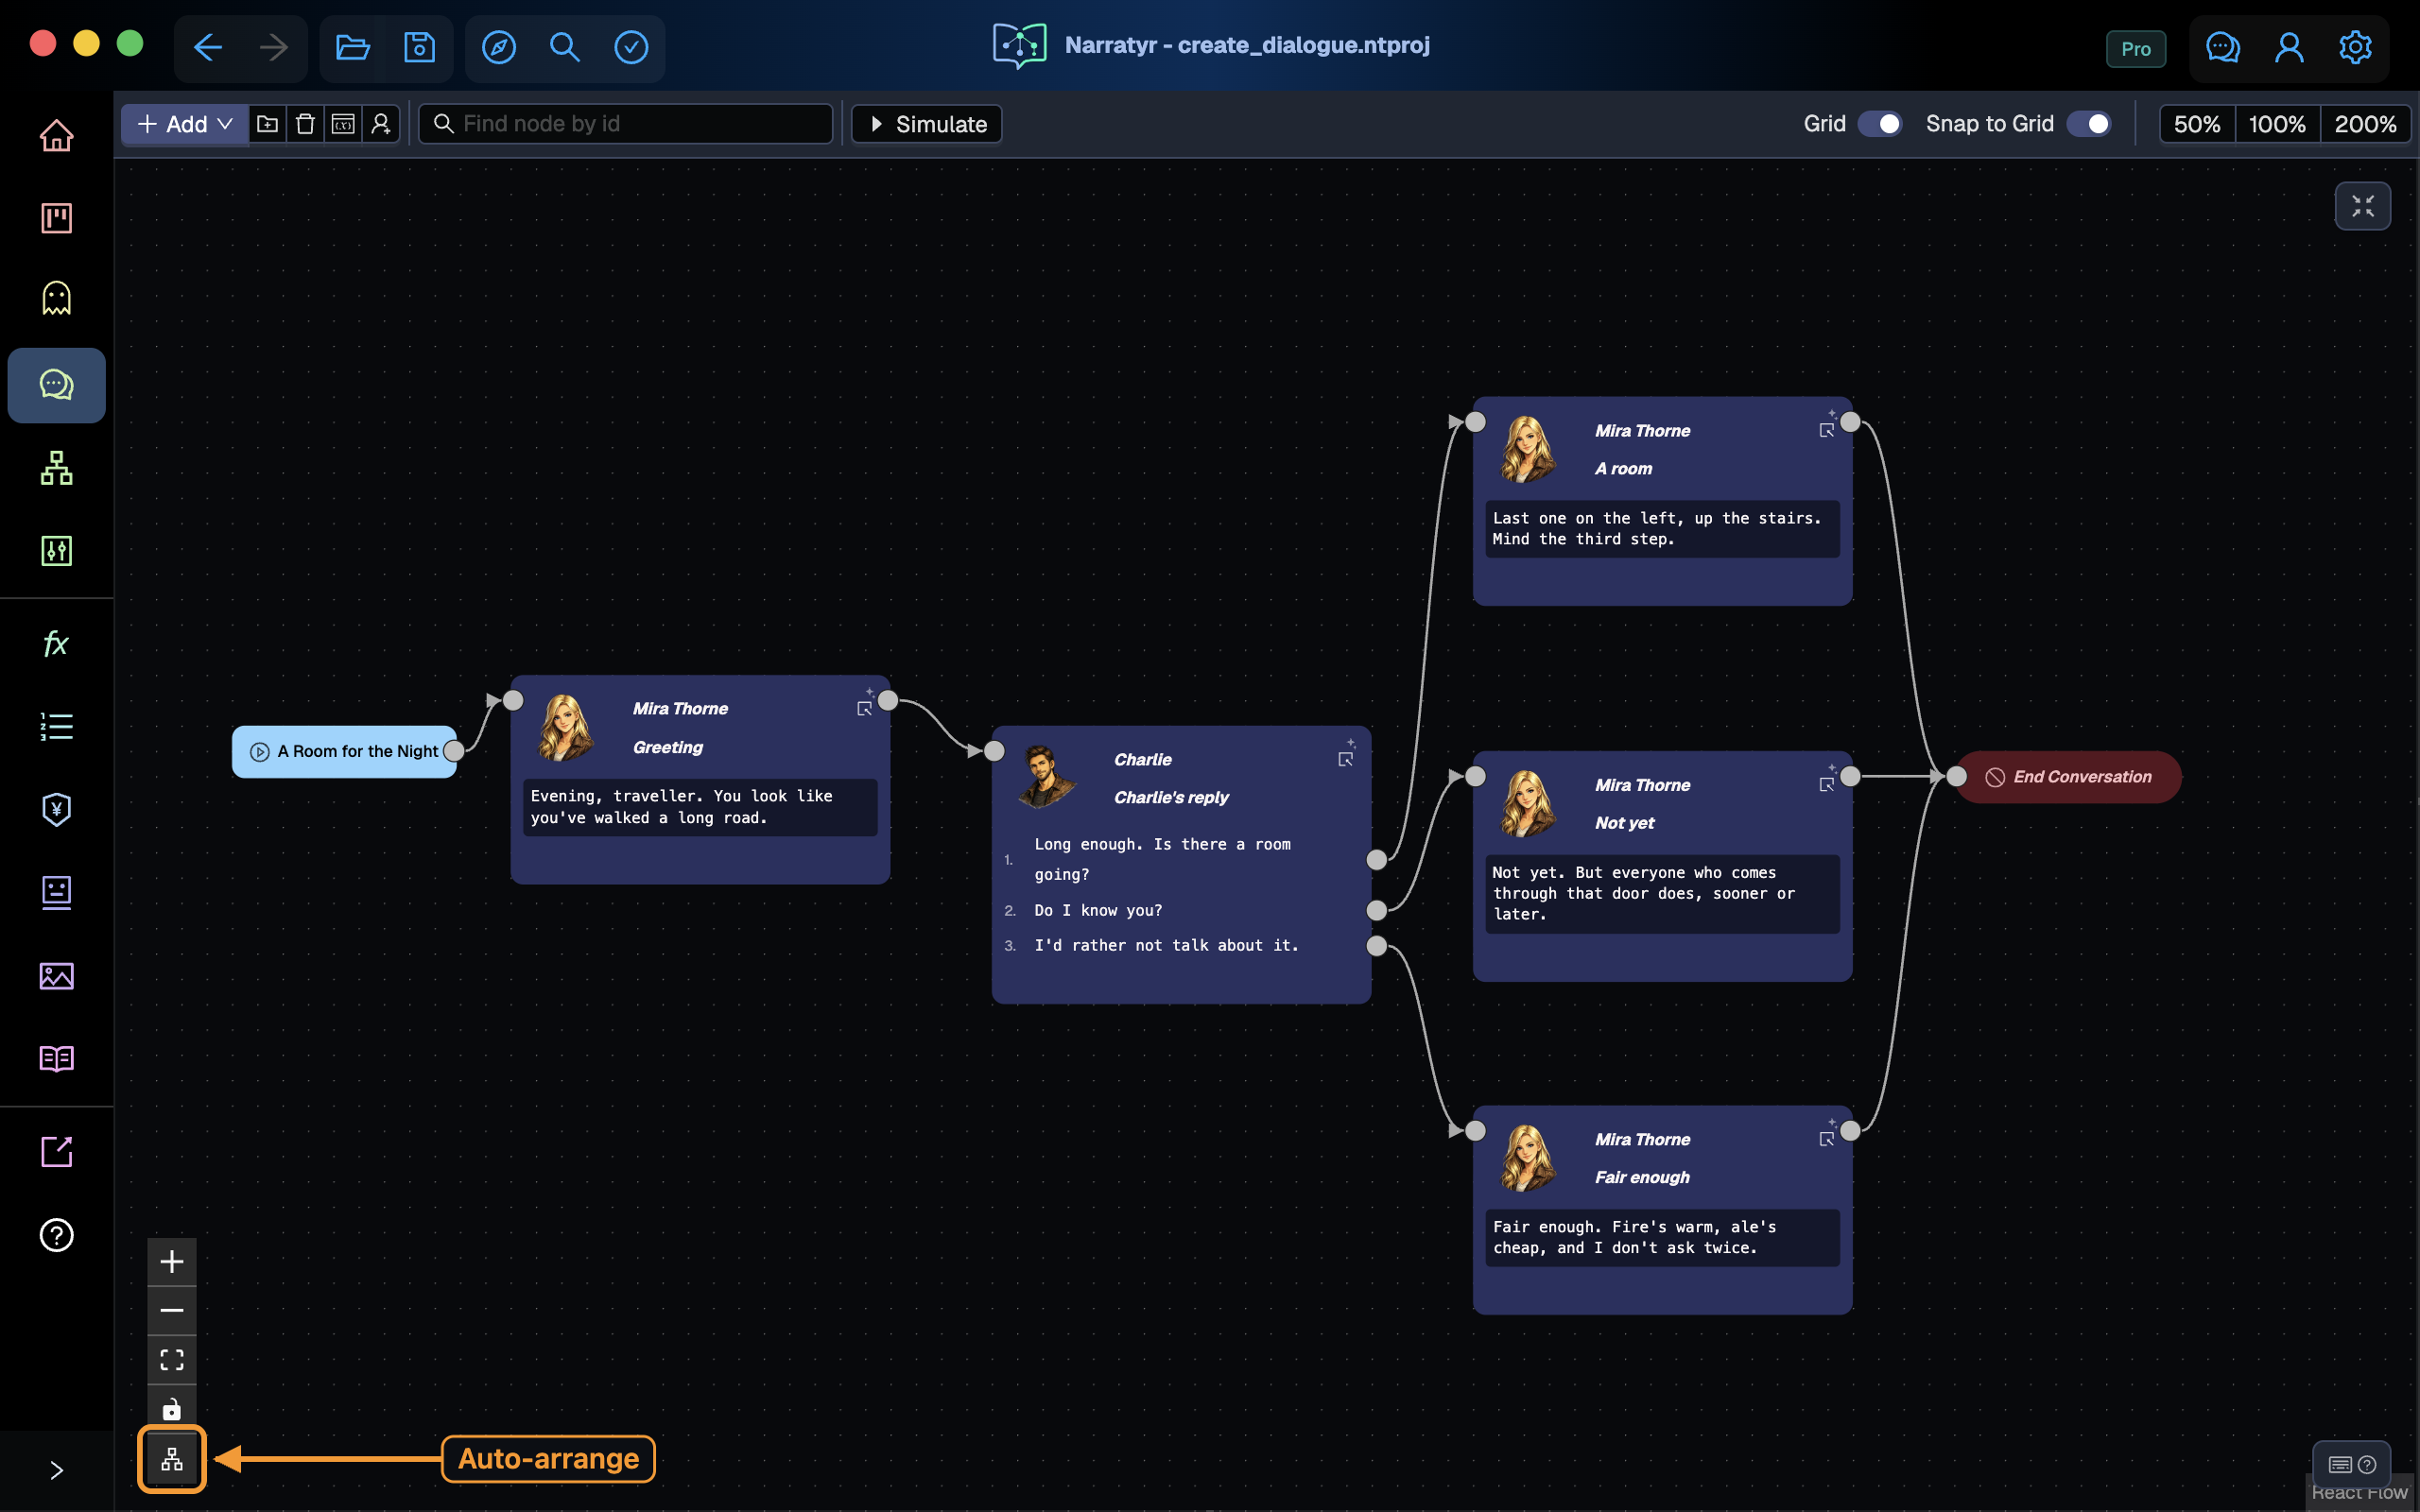
Automatic arrangement places the conversation from left to right and stacks choice branches vertically. The nearby frame button shows the complete graph in the window.
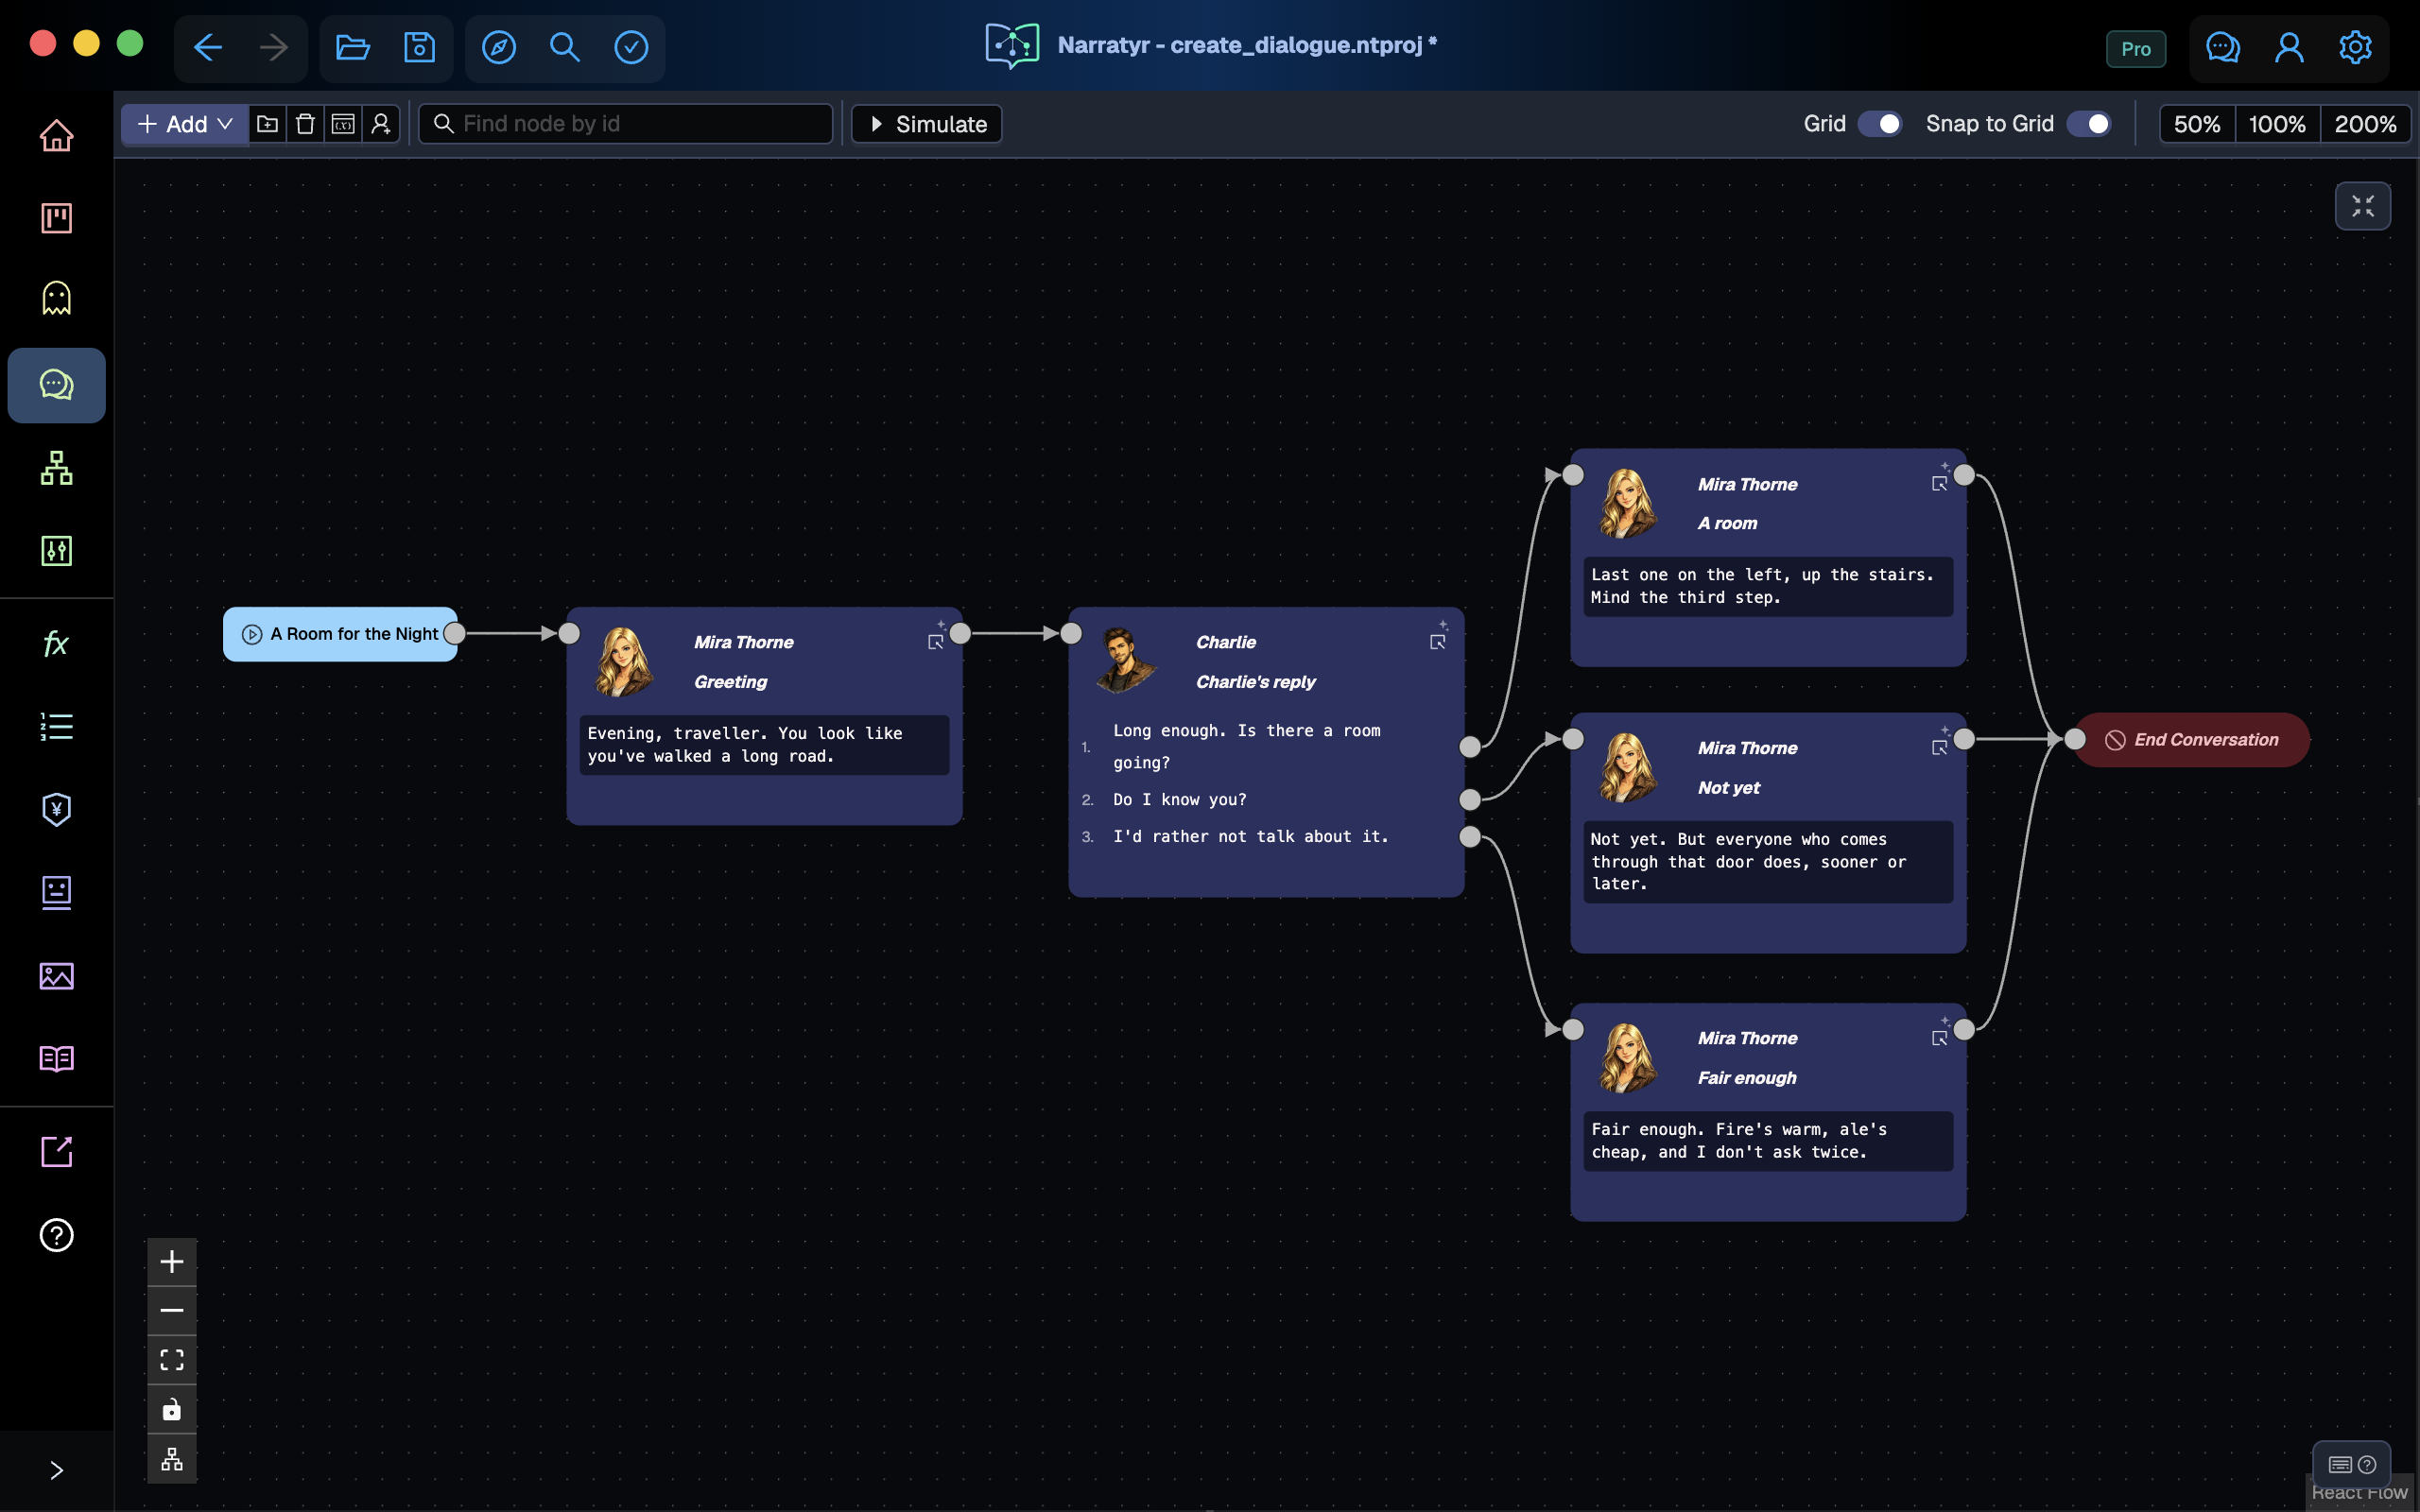
The graph now follows this order during play. Mira speaks, Charlie selects a reply, Mira answers, and the conversation ends.
Save the project
Select the expand button again to restore the tree and properties panels.
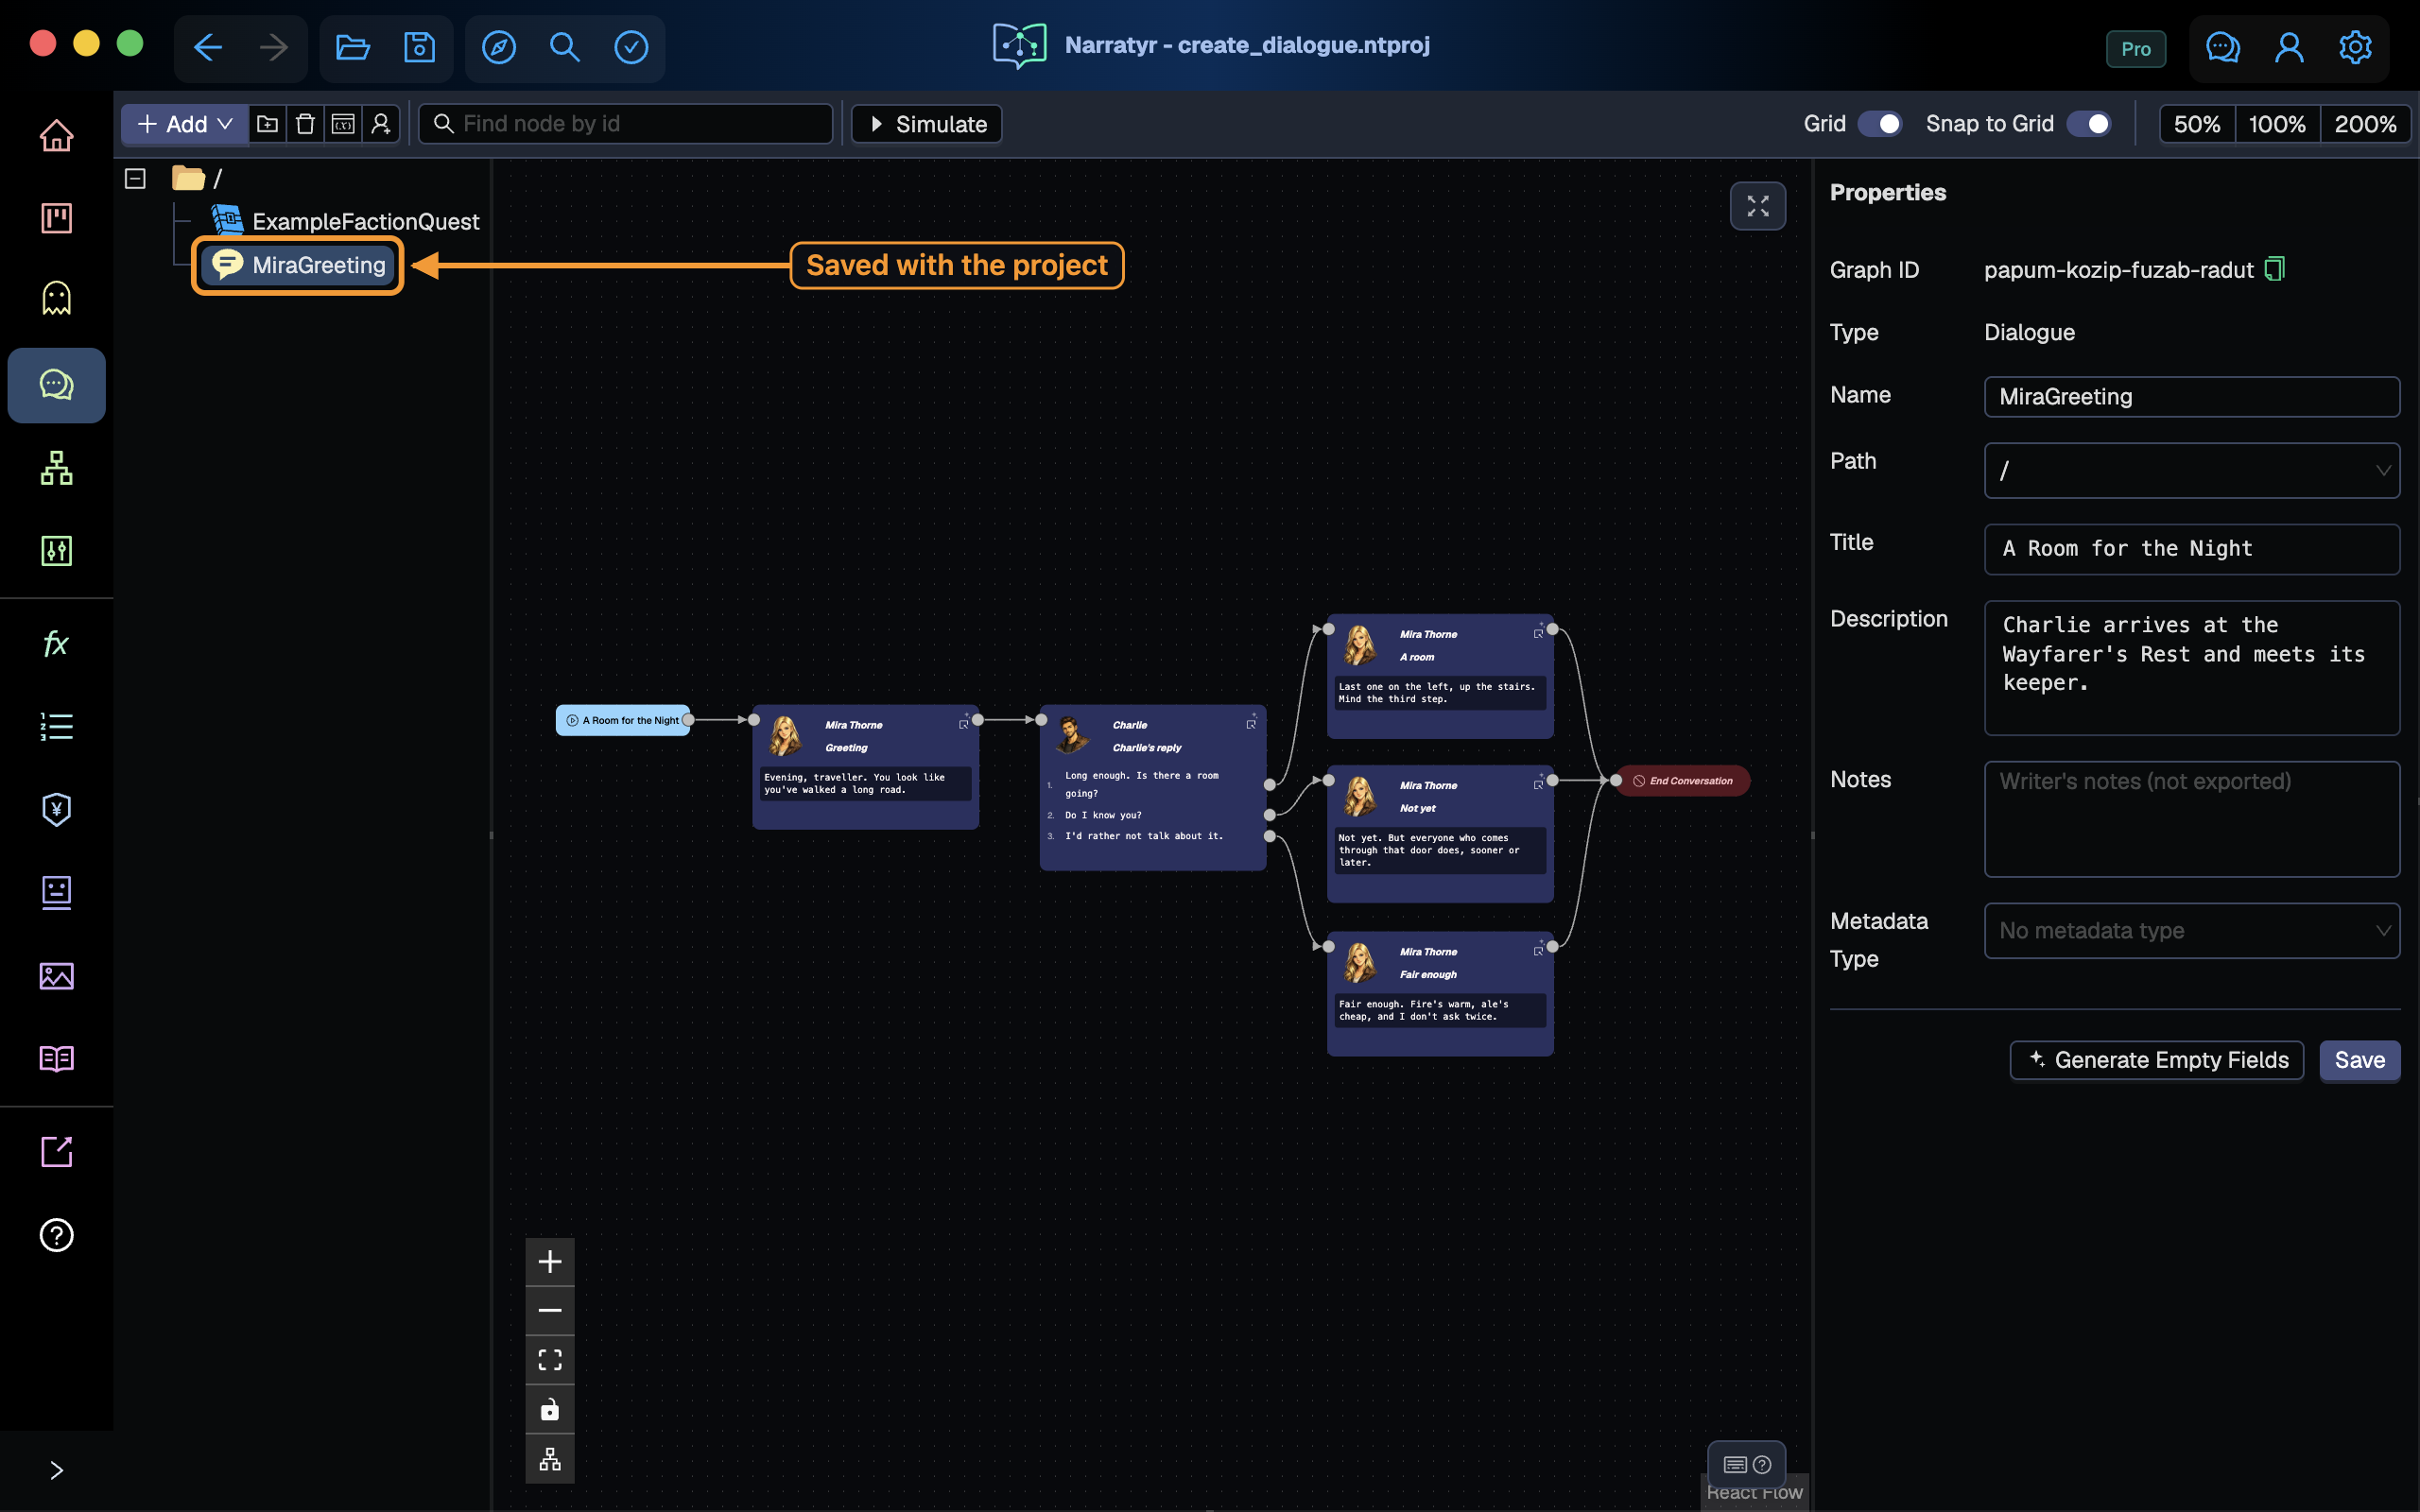
Press ⌘S to save. An asterisk beside the project name indicates unsaved changes.
Next
Variables and conditions explains how to show or hide choices based on game state. Documents and the file format describes the dialogue file on disk, and Exporting covers engine export.